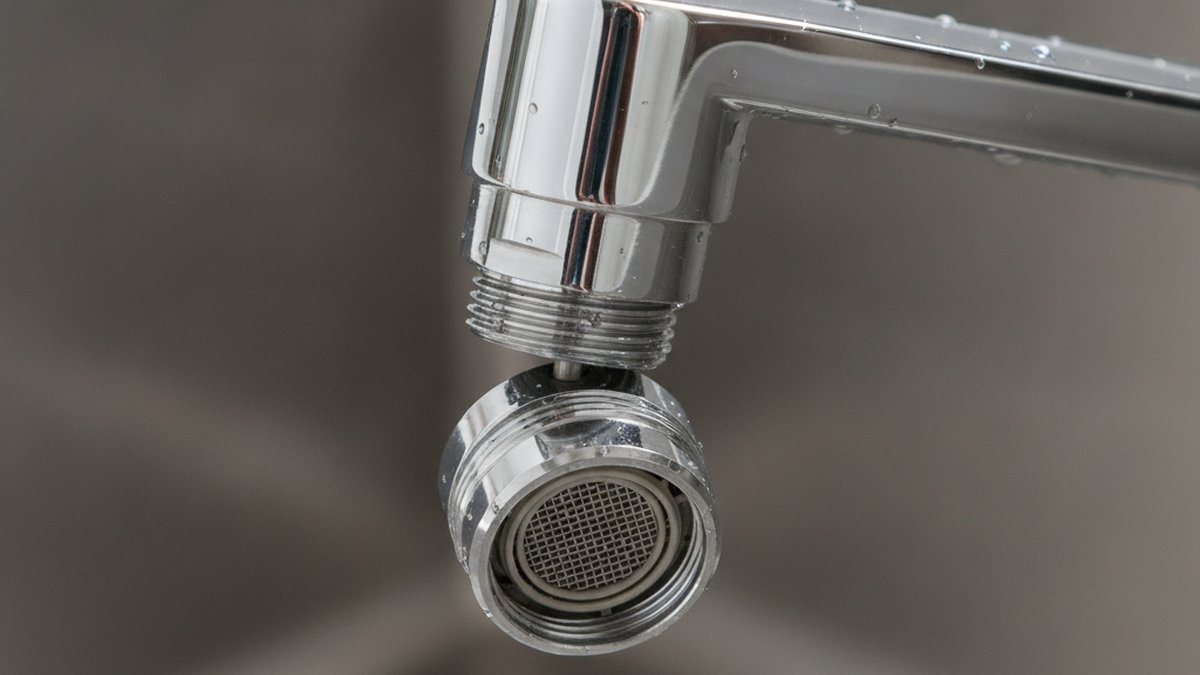
Learning how to remove kitchen faucet aerator Moen models use is one of those five-minute jobs that suddenly feels impossible when the part won’t budge. Good news: on almost every Moen kitchen faucet, the aerator threads out by hand or with a small tool, and mineral buildup — not a broken part — is the usual reason it feels welded on. Below I’ll walk you through the exact steps, the difference between Moen’s standard and hidden aerators, and what to do when the thing simply refuses to turn.
The aerator is the little screw-on tip at the end of your spout. It’s a small screen that mixes air into the water so you get a soft, splash-free stream instead of a fire-hose blast. When it clogs with hard-water scale, your flow drops, sprays sideways, or sputters — and cleaning or swapping the aerator fixes it without touching the rest of the faucet.
What tools do I actually need to remove a Moen aerator?
For most Moen kitchen faucets you need almost nothing: your hand and a rag. If it’s stuck, add slip-joint pliers (or an adjustable wrench) and a soft cloth to protect the finish. For Moen’s newer pull-down spouts, you’ll want the plastic aerator key Moen ships in the box.
Here’s the short kit that handles 95% of Moen aerators:
- A microfiber or terry cloth — protects the chrome or brushed-nickel finish and gives you grip.
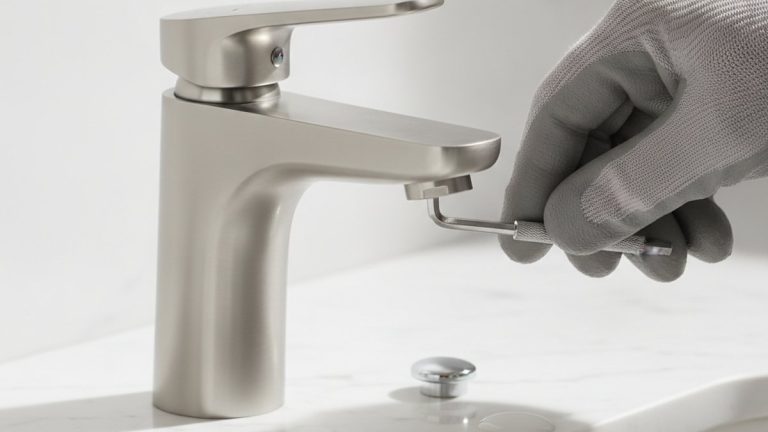
- The Moen plastic aerator key — a small white or gray tool with tabs that fit into a recessed “cache” aerator. Lost yours? A universal aerator key from any hardware store costs about $5.
- Slip-joint or channel-lock pliers — only for stubborn standard aerators, always over a cloth.
- White vinegar and a small bowl or sandwich bag — for dissolving the mineral scale that’s usually the real culprit.
- An old toothbrush — to scrub the screen once it’s out.
Do not reach for a pipe wrench or lock the pliers down hard on a bare metal aerator. Moen aerator housings are thin brass or plastic, and crushing them turns a five-minute clean into a full spout-tip replacement.
How do I remove a standard Moen kitchen faucet aerator by hand?
Grip the aerator, turn it counterclockwise, and it unthreads in three to five turns. “Counterclockwise” here means as you look up at the underside of the spout — which looks like clockwise when you glance down from above, so go by feel, not by staring at it from the top.
Step by step:
- Close the drain. Drop the stopper or lay a rag over it so you don’t lose the tiny washer or the aerator itself down the pipe.
- Wrap the tip in a cloth. Cover the very end of the spout where the aerator screws in.
- Twist counterclockwise by hand. Firm, steady pressure. If it moves even a hair, keep going — it’ll loosen the rest of the way easily.
- If your hand slips, use pliers over the cloth. Squeeze just enough to grip, then turn. Once it breaks free, finish by hand.
- Catch the parts. As it comes off, the aerator, a rubber washer, and sometimes a flow restrictor will separate. Keep them in order.
When it’s out, run the faucet for a second — if the flow is suddenly strong and clean, your aerator was simply clogged and a soak will bring it back to life.
How do I remove a hidden (cache) aerator on a Moen pull-down faucet?
Moen pull-down and many newer single-handle spouts use a hidden or “cache” aerator that sits recessed inside the spout tip with no flats to grip — you remove it with the plastic aerator key, not pliers. Insert the key’s tabs into the notches inside the spray head, turn counterclockwise, and the whole cartridge lifts out.
The trick is that there’s nothing to grab from the outside on purpose — it’s flush for looks. Here’s how to do it right:
- Find the key. Moen faucets ship with a small plastic tool (often white). It has raised tabs on one end sized to the aerator’s internal notches.
- Seat the tabs. Push the key straight into the end of the spout or spray head until the tabs drop into the slots. You’ll feel it click into place.
- Turn counterclockwise. A quarter to a half turn usually breaks it loose, then it spins freely.
- Pull the key straight out — the aerator insert comes with it. Some models also have a rubber gasket that stays behind; leave it unless you’re replacing everything.
No key? A universal cache aerator key kit from a hardware store fits most Moen sizes, or you can carefully use needle-nose pliers spread inside the notches — but the key is far safer and won’t scratch the finish. If you’re doing broader work on a pull-down model, our guide on pull-down kitchen faucet sprayer head replacement covers what happens once the aerator is off and you’re dealing with the spray head itself.
What’s the difference between a standard and a hidden Moen aerator?
A standard aerator screws onto external or internal threads at the spout tip and can be gripped and turned; a hidden (cache) aerator sits recessed and needs a key. Knowing which you have tells you exactly what tool to reach for before you start twisting.
| Feature | Standard Aerator | Hidden / Cache Aerator |
|---|---|---|
| Where it’s found | Older Moen kitchen & bath faucets | Newer Moen pull-down & single-handle spouts |
| How to grip it | By hand or pliers over a cloth | Plastic aerator key inserted into internal notches |
| Visible from outside? | Yes — you can see the ring or flats | No — flush and recessed for a clean look |
| Thread type | Male (outside) or female (inside) threads | Slotted cartridge, no external threads |
| Turn direction to remove | Counterclockwise (from below) | Counterclockwise with the key |
| Typical replacement cost | $5–$12 | $8–$18 (key often included) |
If you look at the end of your spout and see a knurled ring or a flat-sided edge, it’s standard. If the tip is smooth and you can only see the screen recessed inside, it’s a cache aerator and you’ll want the key.
My Moen aerator is stuck solid — how do I get it off without breaking it?
Soak the aerator in white vinegar to dissolve the mineral scale that’s gluing it in place, then try again. Nine times out of ten a stuck Moen aerator isn’t over-tightened — it’s cemented by hard-water calcium, and vinegar breaks that bond in 30 to 60 minutes.
Work through these in order, gentlest first:
- Vinegar soak in a bag. Fill a sandwich bag with white vinegar, slip it over the spout tip so the aerator is submerged, and rubber-band it in place. Leave it 30–60 minutes, then try turning it. This is the same principle behind the shower head Ziploc bag trick — vinegar dissolves the scale that’s seizing the threads.
- Add grip. Wrap the tip in a rubber band or wide rubber jar-opener before using pliers; the rubber bites without scratching.
- Tap, don’t force. Lightly tap around the aerator with the plastic handle of a screwdriver to shock loose crusted deposits.
- Heat carefully. A hair dryer on the metal tip for a minute expands the housing slightly and can free a stubborn thread.
- Two-tool method. Hold the spout steady with one wrench (over cloth) and turn the aerator with pliers, so you’re not stressing the whole faucet body.
If it still won’t move after a soak, resist the urge to crank harder — you’ll strip the threads or snap a plastic cache housing. At that point, replacing the aerator (a few dollars) is smarter than risking the spout. When the whole faucet is corroded to that degree, you may be dealing with the bigger problem covered in our guide on how to remove a very old kitchen faucet when the nuts are rusted solid.
How do I clean the aerator and put it back on correctly?
Rinse the parts, brush the screen with vinegar and an old toothbrush, then reassemble in the exact order they came off and hand-tighten only. Over-tightening on reinstall is the number-one reason the aerator becomes impossible to remove next time.
Cleaning and reinstalling:
- Disassemble over a towel so you don’t lose the washer or restrictor. Lay the pieces out left to right in the order they separated.
- Soak the screen in vinegar for 15–20 minutes if it’s crusty, then scrub gently with a toothbrush. Poke any blocked holes with a toothpick or pin.
- Rinse thoroughly under running water to flush out debris and dissolved scale.
- Reassemble in reverse order — screen, washer, housing — the way it came apart.
- Hand-tighten, then a quarter turn. Snug is enough. If it drips at the threads, add a wrap of plumber’s tape, don’t just crank harder.
- Test. Run hot and cold; the stream should be soft, straight, and splash-free.
If your flow is still weak after a clean and the aerator was clear, the problem may be upstream — a clogged cartridge or supply-line issue rather than the aerator. A weak stream on a touchless or single-handle unit can mimic an aerator clog; our breakdown of low water pressure on a touchless faucet walks through how to tell the two apart even though it’s written for a Delta model — the diagnostic logic is the same for Moen.
When should I just replace the aerator instead of cleaning it?
Replace the aerator if the screen is torn, the threads are stripped, or it still sputters after a thorough vinegar clean — a new one costs $5–$18 and takes two minutes to install. Cleaning restores an aerator that’s simply clogged; it can’t fix physical damage.
Signs it’s time for a new one:
- The mesh screen is bent, torn, or corroded through.
- Threads are cross-threaded or stripped so it won’t seat straight.
- You still get a sideways or split stream after cleaning.
- The rubber washer is cracked and leaking at the tip.
When you buy a replacement, match the thread size and gender to your Moen model — Moen publishes aerator part numbers by faucet series, and using a genuine Moen or correctly-sized universal aerator keeps your flow rate within the faucet’s rated spec. Standard U.S. kitchen aerators are limited to 1.8–2.2 gallons per minute (GPM) under WaterSense guidelines, so grabbing a mismatched high-flow insert can actually make your faucet perform worse, not better.
FAQ
Which way do you turn a Moen aerator to remove it?
Counterclockwise as you look up at the underside of the spout. Because you’re usually looking down at the faucet, it can feel backwards — righty-tighty, lefty-loosey still applies, just from the water’s-eye view. If it isn’t budging, you’re either turning the wrong way or it’s scaled shut and needs a vinegar soak.
Do all Moen kitchen faucets have a removable aerator?
Yes. Every Moen kitchen faucet has a removable aerator so you can clean or replace it, but the removal method differs: older models use a standard screw-on aerator you turn by hand or with pliers, while newer pull-down spouts use a recessed cache aerator that needs the plastic key. If you can’t see external threads, you almost certainly have the hidden type.
Where is the aerator key on a Moen faucet?
It ships in the box with the faucet — a small white or gray plastic tool, often taped to the installation hardware or the instruction sheet. If yours is long gone, a universal aerator key kit runs about $5 at any hardware store and covers most Moen cache sizes. Keep it in the cabinet under the sink so it’s there next time.
Can I remove a Moen aerator without any tools?
Often yes, on standard aerators — wrap the tip in a rag for grip and twist counterclockwise by hand. Cache (hidden) aerators genuinely need the key or a substitute, because there’s nothing to grip from the outside. Never use bare metal pliers directly on a visible finish; you’ll leave marks you can’t buff out.
Why is my Moen faucet aerator so hard to unscrew?
Hard-water mineral scale — calcium and lime — builds up in the threads and effectively cements the aerator in place. It’s rarely that someone over-tightened it. Soak the tip in white vinegar for 30–60 minutes to dissolve the deposits, tap gently to crack the crust, then try again with a cloth-protected grip. Forcing a scaled aerator strips the threads.
How often should I clean my kitchen faucet aerator?
Every three to six months if you have hard water, once a year if your water is soft. If you notice reduced flow, a spraying or split stream, or sputtering, that’s your cue to pull and clean it regardless of schedule. Regular cleaning also keeps the aerator from seizing, so it stays easy to remove.
A quick word on trusting this guide
Author note: This guide was written by the faucitta fixtures team, who install, test, and troubleshoot kitchen and bath faucets across dozens of brands every week — including hands-on removal of both standard and cache-style Moen aerators. About faucitta: faucitta (faucitta.net) is a dedicated faucet and bathroom-fixtures retailer focused on helping homeowners buy and maintain the right hardware without overpaying for a plumber on jobs they can safely do themselves. The techniques above reflect Moen’s own documented aerator-removal method and standard plumbing practice; replacement aerators should meet WaterSense flow-rate standards and, on a faucet still under Moen’s limited lifetime warranty, using genuine Moen parts keeps that coverage intact. When in doubt, check your specific model’s spec sheet before buying a replacement.