The shower head Ziploc bag trick is the single cheapest plumbing fix in your whole house: you fill a sandwich bag with plain distilled white vinegar, submerge the shower head’s face in it, secure it with a rubber band or twist tie, and leave it to soak for a few hours. The acetic acid in the vinegar eats through the chalky white calcium and magnesium deposits — limescale — that plug up the little rubber or brass spray nozzles and turn a strong shower into a sad, splitting dribble. It’s a real fix, not a wives’ tale, and below I’ll walk you through exactly how to do it, when it won’t be enough, and how to tell whether you’ve got a $0 cleaning problem or a $40 replacement problem.
I’ve cleaned, tested, and swapped out a lot of shower heads, and the honest truth is that most people run this trick wrong (too little time, the wrong vinegar, or a bag that keeps falling off) and then blame the shower head. Let’s fix that.
How exactly do I do the shower head Ziploc bag trick without it falling off overnight?
Fill a bag with enough white vinegar to fully cover the spray face, push the shower head down into it so the nozzles are submerged, and cinch it tight against the neck of the shower arm with a rubber band — then double the rubber band and add a twist tie so it doesn’t slide off while you sleep. That’s the whole trick. The two failure points are (1) not enough vinegar to actually cover the face and (2) a loose seal that drains out overnight, so both deserve real attention.
Here’s the step-by-step I use:
- Pick the right bag. A quart sandwich bag works for a small fixed head; a gallon freezer bag is better for a large rain head or a handheld with a big face. Freezer bags are thicker and less likely to split at the rubber band.
- Use distilled white vinegar, straight. Don’t dilute it. Standard 5% white vinegar is what you want — not apple cider vinegar (it stains), not cleaning vinegar at 30% unless you rinse very well.
- Fill the bag about one-third to halfway. Roughly 1 to 2 cups. You need the face submerged, not the whole fixture.
- Bag the head. Slide the bag up over the shower head so the face sits in the vinegar. Air will push out; that’s fine.
- Cinch and secure. Rubber band around the neck, then a second rubber band, then a twist tie or a zip tie for insurance. Tug on it — if it slides, it’ll drain.
- Soak 3–4 hours minimum, overnight for heavy buildup. Chrome and stainless can safely soak overnight. See the finish warning below.
- Remove, then scrub the nozzles. Peel the bag off, and with the shower running, rub each rubber nozzle with your thumb or an old toothbrush. The dissolved scale flakes right off.
- Run hot water for 60 seconds to flush loosened debris out of the waterway.
That last scrub-and-flush step is the one everyone skips, and it’s the one that actually restores the spray. Vinegar loosens the scale; your thumb and the water pressure remove it.
How long should I leave the shower head in vinegar — and can I ruin the finish?
Leave it 3–4 hours for a light clog and overnight (8–12 hours) for heavy limescale, but stop at 30 minutes if your shower head is brass, gold, oil-rubbed bronze, or nickel-plated, because vinegar’s acid can dull or discolor those coated finishes. Chrome and solid stainless steel are the tough guys — they shrug off an overnight soak with no problem.
This finish issue is where the “harmless kitchen hack” advice gets people in trouble. A cheap chrome or plastic head doesn’t care. But a designer brand-name shower fixture in a specialty finish like brushed gold or matte black can develop cloudy patches or lose its living-finish coating if it marinates in acid all night. When in doubt, do a 30-minute soak, check the result, and repeat rather than doing one long overnight bath.
| Shower head finish/material | Safe max soak time in white vinegar | Notes |
|---|---|---|
| Chrome (plated) | Overnight, 8–12 hrs | Most durable; the classic candidate for this trick |
| Stainless steel | Overnight, 8–12 hrs | Very acid-tolerant |
| Plastic / ABS with chrome coat | 4–6 hrs | Fine, but rinse well |
| Brushed nickel | 30–60 min max | Can dull; short soaks only |
| Oil-rubbed bronze | 15–30 min max | Living finish; acid strips it |
| Brushed gold / champagne bronze | 15–30 min max | Test a small spot first |
| Matte black | 30 min max | Can develop cloudy spots |
Why is my shower head clogged in the first place — is it just hard water?
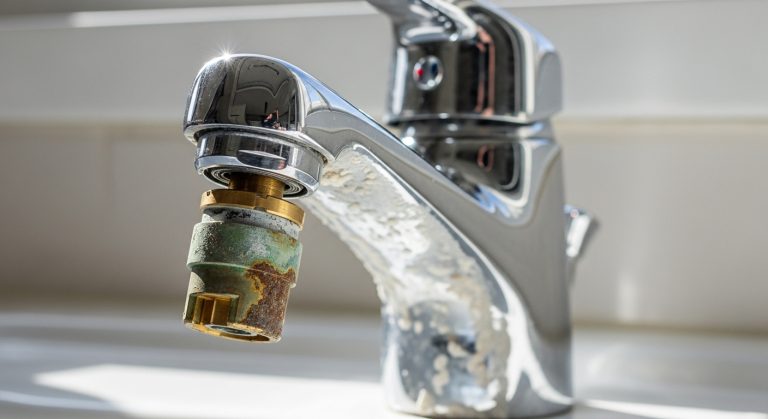
Almost always, yes — it’s hard water. The white, crusty buildup on your nozzles is limescale: calcium and magnesium that precipitate out of your water and cake onto the spray face and the internal channels every time the head dries out between showers. If you live somewhere with hard water (much of the U.S. Southwest, Midwest, and Texas sits above 7 grains per gallon), you’ll see this within months.
A few things make it worse and worth knowing about:
- High mineral content (hardness). The more grains per gallon, the faster the crust forms. Well water is often the worst offender.
- Heat. Hot water drops out minerals faster than cold, which is why shower heads scale up faster than, say, a garden spigot.
- Rubber nozzle heads clog “prettier.” Modern heads with soft rubber tips are designed so you can rub the scale off — that’s a feature. Older brass-faced heads hide the buildup inside where you can’t reach it.
- Iron in the water adds orange-brown staining on top of the white scale.
If you’re fighting this fight every couple of months across the whole bathroom — shower head, faucet aerators, glass doors — the real root-cause fix is upstream. It’s worth reading up on how to pick fixtures built for hard water, because some faucets and heads resist scale far better than others, and a whole-house or shower-line filter can end the problem entirely rather than treating it every eight weeks.
Does the Ziploc bag trick work better than dropping the whole head in a bowl of vinegar?
The bag and the bowl clean equally well — the vinegar doesn’t care about its container — but the Ziploc bag wins on convenience because you don’t have to unscrew the shower head, and the bowl wins when you’ve got a really stubborn clog you want to attack with heat. Pick based on how your head is mounted and how bad the buildup is.
Use the Ziploc bag (in place) when your shower head is a pain to remove, when the buildup is light-to-moderate, or when you just want a no-tools overnight fix. Use the bowl soak (removed) when the head unscrews easily, when the clog is severe, or when you want to warm the vinegar (gently — never boil it) to speed up the reaction, which you obviously can’t do in a bag taped to the wall.
| Method | Best for | Effort | Cleaning power |
|---|---|---|---|
| Ziploc bag, head in place | Hard-to-remove heads, routine maintenance | Very low — no tools | High for light/moderate scale |
| Bowl soak, head removed | Heavy buildup, easy-to-remove heads | Medium — need a wrench + tape | Highest, especially with warm vinegar |
| Buy a new shower head | Internal waterway clogged, cracked, or 8+ years old | Low — 10-minute swap | Complete — new part, new warranty |
If you do remove the head, wrap the threads with a strip of plumber’s tape (PTFE tape) when you reinstall it to prevent a leak at the connection — a two-minute habit that saves a drip down the wall later.
My shower head is still weak after soaking — do I need a new one?
If two proper vinegar soaks haven’t restored the flow, yes, replace it — the clog is inside the internal flow channels or the flow restrictor where vinegar and your thumb can’t reach, and at that point a new head is cheaper than your time. A decent replacement runs $25–$60, installs in about ten minutes with just plumber’s tape, and comes with a fresh warranty and a clean, unscaled waterway.
Here’s how to tell you’ve crossed from “clean it” to “replace it”:
- The spray is still crooked or split after scrubbing — some nozzles spray sideways or not at all because they’re permanently deformed or blocked deep in the head.
- Overall pressure is weak everywhere, not just at a few nozzles — that points to buildup in the internal channel, not the face.
- The head is 8+ years old — rubber seals harden, and it’s simply worn out.
- You see cracks, or it leaks from the swivel ball even after tightening.
- You want more pressure than you ever had — a modern low-flow head at 1.75–2.0 GPM can actually feel stronger than a scaled-up old 2.5 GPM head because it’s engineered to pressurize the spray.
Flow rate matters more than people think. A shower head is capped at 2.5 GPM by federal standard (and 2.0 or 1.8 GPM in states like California and Colorado), and a well-designed low-flow head channels that water into a firmer spray. The same logic applies at the sink — if you’re curious how flow numbers translate into real-world feel, our breakdown of what GPM actually means for water pressure explains why a lower number doesn’t have to mean a weaker stream. And if hard water is the underlying enemy, the same scale that kills shower heads clogs your bathroom faucet sprayers too, so it’s worth solving once for the whole room.
What should I NOT do when cleaning a shower head?
Don’t use bleach, don’t use a metal pick that gouges the rubber nozzles, and don’t soak coated or specialty finishes overnight — each of these does more harm than the limescale ever would. Vinegar plus a soft brush plus your thumb is the entire toolkit you need.
- No bleach. It doesn’t dissolve mineral scale (that’s a chemistry mismatch — scale is alkaline, you need an acid), it can damage rubber and metal, and mixing it with other cleaners is dangerous.
- No hard metal picks. A safety pin can clear one nozzle, but dragging metal across soft rubber tips tears them and makes the spray worse. Rub with your thumb instead.
- Don’t skip the rinse. Leftover vinegar smells and, on sensitive finishes, keeps etching. Flush with hot water.
- Don’t over-tighten on reinstall. Hand-tight plus a quarter turn with a taped-jaw wrench is plenty; cranking it cracks plastic threads.
- Don’t ignore the flow restrictor. If you remove it to “boost pressure,” you’ll waste water and may void the warranty — clean around it instead.
FAQ
How long do you leave a Ziploc bag of vinegar on a shower head?
Three to four hours for light buildup and overnight (8–12 hours) for heavy limescale on chrome or stainless steel. For brushed nickel, bronze, gold, or matte black finishes, limit it to 15–30 minutes and repeat if needed, because acid can dull those coatings.
Can I use apple cider vinegar or does it have to be white vinegar?
Use distilled white vinegar. It’s clear, cheap, and 5% acetic acid — perfect for dissolving limescale. Apple cider vinegar has the same acid but can leave a faint brown tint and a stronger smell, so it’s a second-choice backup, not the go-to.
Will the vinegar trick fix low water pressure in my shower?
It will if the low pressure is caused by mineral buildup on or just behind the spray face, which is the most common cause. It won’t fix low pressure coming from a clogged internal waterway, a bad pressure-balancing valve, or genuinely low household water pressure — in those cases you either replace the head or look further up the plumbing.
How often should I clean my shower head this way?
In hard-water areas, every 1–3 months keeps the spray strong; in soft-water areas, once or twice a year is plenty. If you’re re-soaking every few weeks, install a shower filter or address your home’s water hardness rather than treating the symptom forever.
Is it cheaper to clean the shower head or just replace it?
Cleaning is essentially free (a cup of vinegar and a bag you already own), so always try that first. Replace only when two proper soaks fail to restore flow, when the head is cracked or leaking, or when it’s 8+ years old — a solid replacement is $25–$60 and installs in about ten minutes.
Does soaking damage a chrome shower head?
No. Chrome and stainless steel tolerate an overnight vinegar soak with no damage, which is exactly why this trick is so popular — most standard shower heads are chrome-plated. It’s only the softer coated finishes (bronze, gold, nickel, matte black) that need short soaks.
The bottom line from our team
The shower head Ziploc bag trick is real, it’s nearly free, and it should always be your first move. Do it right — enough vinegar, a secure bag, the right soak time for your finish, and a proper scrub-and-flush at the end — and you’ll restore a strong spray in the overwhelming majority of cases. Reach for a replacement only when the clog lives somewhere your vinegar can’t, or when the head is simply old. And if you’re stripping scale off every fixture in the bathroom every couple of months, stop treating symptoms and fix the water: a filter or hardness solution pays for itself in saved fixtures.
Author note: This guide was written by the faucitta fixtures team, drawing on hands-on testing of dozens of shower heads and bathroom faucets across chrome, stainless, and specialty finishes, plus real hard-water field experience. faucitta designs and sells faucets, shower heads, and bathroom fixtures built to resist scale and last, and our shower heads meet U.S. EPA WaterSense and ASME A112.18.1 flow and safety standards and are backed by a manufacturer’s limited warranty. When we say “test it before you replace it,” it’s because we’ve done both — a lot.