Learning how to install a shower handle valve sounds intimidating, but the truth is that 80% of the “installations” people search for are really cartridge or trim swaps inside a valve body that’s already sitting in the wall. The scary version — cutting copper, soldering, and replacing the whole brass valve body — is a smaller job than it looks once you understand which parts actually move water and which parts are just cosmetic. This guide walks through both scenarios in plain language, tells you which tools you truly need, and flags the two or three mistakes that turn a Saturday project into a plumber call.
Before you touch anything, figure out what you’re actually dealing with, because “shower handle valve” describes three different jobs stacked on top of each other.
What Exactly Is a Shower Handle Valve — the Handle, the Cartridge, or the Whole Valve Body?
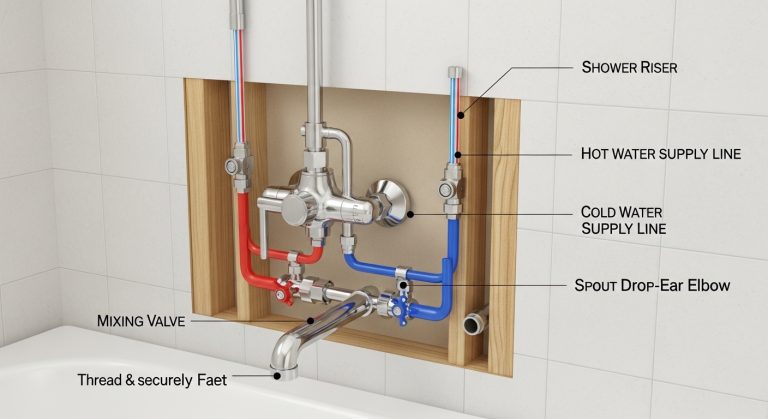
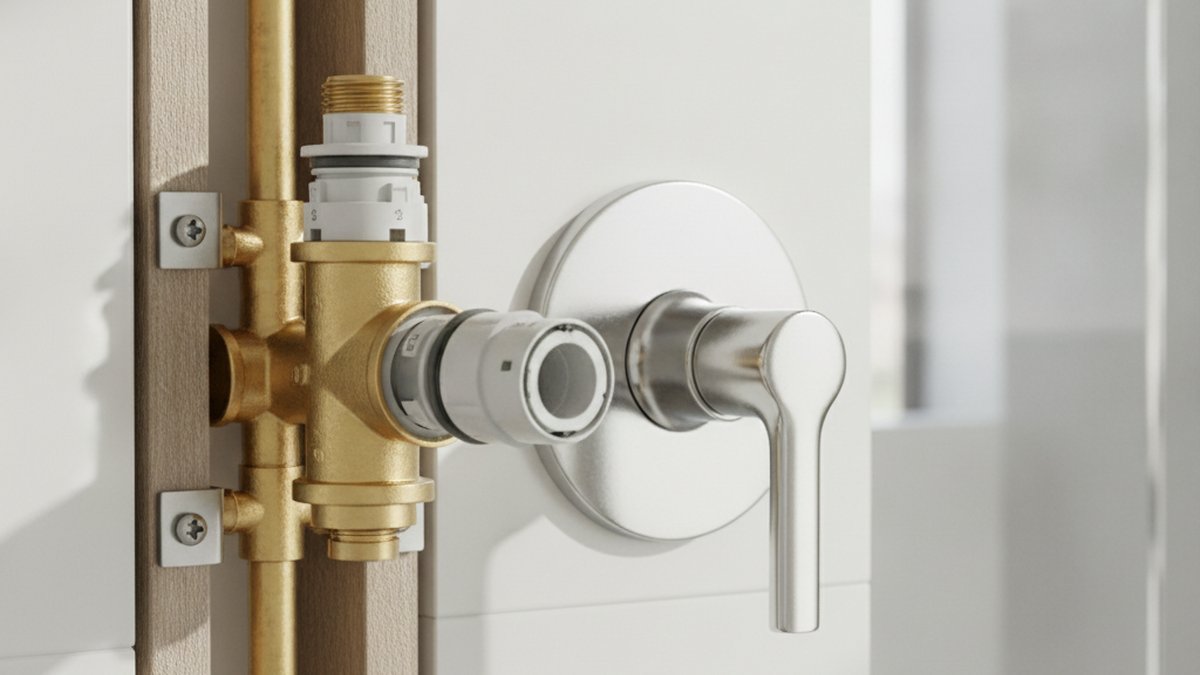
A shower handle valve is really three parts working together: the valve body (the brass block soldered or connected to your hot and cold supply lines inside the wall), the cartridge (the replaceable insert that mixes hot and cold and controls flow), and the trim (the handle, escutcheon plate, and sleeve you see and touch). Knowing which one is failing tells you which job you’re really doing.
- Handle only loose or stripped? That’s a trim swap — 20 minutes, no water shutoff to the house needed beyond the shower.
- Dripping, hard to turn, or temperature won’t hold? That’s almost always a worn cartridge inside a perfectly good valve body. This is the most common “install” and needs no soldering.
- Valve body cracked, leaking behind the wall, or you’re moving to a modern pressure-balanced valve? That’s a full valve-body replacement, which means accessing the pipes and joining new connections.
If your handle simply wobbles or won’t tighten, you may not even be here for a valve at all — our guide on how to change a faucet handle yourself without calling a plumber covers the pure trim scenario in more detail. Come back here if the water behavior — drips, weak flow, scalding swings — points to the cartridge or body.
What Tools and Parts Do I Actually Need to Install a Shower Handle Valve?
For a cartridge or trim swap you need almost nothing: an Allen key, a Phillips screwdriver, adjustable pliers or a cartridge puller, and plumber’s grease. For a full valve-body replacement you add pipe-joining tools. Here’s the honest list so you don’t over-buy.
| Job type | Tools you need | Typical parts cost | Time |
|---|---|---|---|
| Handle/trim swap | Allen key, Phillips driver, silicone grease | $25–$80 (trim kit) | 20–45 min |
| Cartridge replacement | Above + cartridge puller, needle-nose pliers, vinegar | $15–$60 (cartridge) | 45–90 min |
| Full valve body (copper, soldered) | Above + torch, solder, flux, pipe cutter, emery cloth | $60–$150 (valve) | 2–4 hrs |
| Full valve body (PEX or push-fit) | Above + PEX crimp tool or push-fit fittings | $60–$150 (valve) | 1.5–3 hrs |
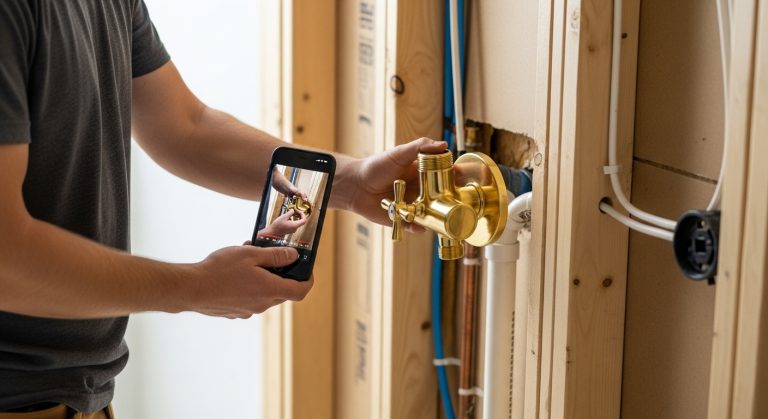
One tip that saves a second trip to the store: photograph your existing handle and any brand markings on the trim before you shop. Cartridges are brand- and often model-specific — a Moen cartridge won’t drop into a Delta body. If you can’t identify the brand, take the old cartridge with you as a physical match. Buying a manufacturer-matched cartridge rather than a generic one is the single biggest factor in whether your repair holds up for another decade.
How Do You Install a Shower Handle Valve Cartridge Step by Step?
Here’s the core job — replacing the cartridge inside an existing valve body, which is what most people actually mean by “installing a shower handle valve.” Do these steps in order and you won’t flood anything.
- Shut off the water. Use the shower’s built-in stops if it has them (small screws inside the trim plate), or shut off the house main. Then open the shower handle to relieve pressure and drain the line.
- Remove the handle. Pop off the decorative cap, loosen the set screw with your Allen key, and pull the handle straight off. Set the screw somewhere you won’t lose it.
- Remove the trim and retaining clip. Unscrew the escutcheon plate, then pull the U-shaped brass or metal retaining clip that holds the cartridge in place. Needle-nose pliers work perfectly here. Do not skip pulling this clip — yanking a cartridge with the clip still in is how people crack a valve body.
- Pull the old cartridge. Grip the cartridge stem with pliers and pull straight out, or use a brand-specific cartridge puller if it’s stuck from mineral buildup. Wiggle, don’t twist wildly.
- Prep the new cartridge. Smear a thin film of silicone plumber’s grease on the O-rings. This is what makes the handle turn smoothly for years instead of grinding after six months.
- Insert and align. Push the new cartridge in with the same orientation as the old one — most have a flat, notch, or “H/C” mark that must face up or match a keyway. Get this wrong and your hot and cold will be reversed.
- Reinstall the clip, trim, and handle. Seat the retaining clip fully, screw the escutcheon back, and reattach the handle.
- Test before you celebrate. Turn the water back on slowly and run the shower through hot, cold, and off. Watch for drips and check that the temperature holds steady.
If your cartridge fought you on the way out because the nuts and metal parts were corroded solid, you’re not alone — mineral seizing is the number-one reason DIYers give up. The same penetrating-oil and patience tactics from our guide on how to remove a very old kitchen faucet when the nuts are rusted solid apply directly to a crusted shower cartridge.
Do I Need to Replace the Whole Valve Body, or Just the Cartridge?
Replace only the cartridge if the valve body is intact and just the mixing/flow is failing — that’s true 90% of the time. Replace the whole valve body only if the brass is cracked, leaking behind the wall, or you’re upgrading from an old non-pressure-balanced valve to a modern anti-scald one. Here’s how to tell them apart.
Signs it’s just the cartridge: dripping when off, stiff handle, water won’t get hot or cold enough, temperature drifts. Signs you need the whole body: water staining or dampness on the wall or ceiling below even when the shower is off, visible cracks in the brass, threads stripped where the cartridge seats, or a valve so old that no replacement cartridge is manufactured anymore.
The upgrade case matters for safety. Older two- and three-handle valves without pressure balancing let the shower go scalding when someone flushes a toilet. A modern pressure-balanced (Type P) or thermostatic (Type T) valve is now required by plumbing code for new installs precisely because of burn risk. If your home still has a vintage valve, replacing the body is a genuine safety improvement, not just a repair.
How Do You Install a New Shower Valve Body Without Tearing Open the Wall?
You install a new valve body by working through the existing valve opening or a plumbing access panel, cutting the old body out at the supply lines, and joining the new one with solder, PEX crimp, or push-fit fittings. You only need to open drywall if there’s no access at all — and even then it’s a neat 8×8-inch cut, not a demolition.
The realistic sequence:
- Find or make access. Many showers have a removable access panel on the back side of the wall (often in a closet or adjoining room). If not, cut a small inspection hole in the drywall behind the valve — far easier to patch than the tiled shower side.
- Shut off and drain the water main, then open a low faucet to drain the risers.
- Cut out the old valve body. Use a pipe cutter or mini-hacksaw on the hot, cold, and shower/tub lines, leaving as much clean pipe as you can to work with.
- Dry-fit the new valve. Position it so the handle stem sits at the right depth for your trim — too deep and the escutcheon won’t cover the hole; too shallow and the handle won’t seat.
- Join the connections. Sweat-solder for copper, crimp for PEX, or use push-fit couplings for the no-torch route. Push-fit fittings are the DIY-friendly choice inside a wall as long as they’re rated for concealed use and fully seated.
- Cap the tub port if shower-only, connect the shower riser, and secure the valve to a cross-brace so it doesn’t move when the handle is used.
- Pressure-test with the wall still open. Turn the water on and inspect every joint for at least 10 minutes before you patch or tile. This is the step that prevents a hidden leak from destroying a wall you just closed.
Joining pipe is the part that scares people, but the fundamentals are the same as any supply connection. If you’ve never sweated a joint, the push-fit route removes the torch entirely, and understanding line length and routing — covered in our piece on whether faucet supply lines can be too long — helps you plan clean, kink-free runs to the new valve.
What Are the Most Common Mistakes When Installing a Shower Handle Valve?
The most common mistakes are reversing hot and cold, forgetting the retaining clip, skipping the silicone grease, and closing the wall before pressure-testing. Every one of these is avoidable in about 30 seconds of attention.
- Reversed hot/cold: Install the cartridge in the exact orientation of the old one. If hot comes out when you turn toward cold after testing, many cartridges can be rotated 180° to fix it without buying anything.
- Lost or unseated retaining clip: Without the clip fully seated, water pressure can slowly push the cartridge out — a slow-motion leak. Seat it until it clicks flush.
- No plumber’s grease: Dry O-rings tear on insertion and make the handle grind. A dab of silicone grease is cheap insurance.
- Overtightening trim screws: Escutcheons and plastic trim crack easily. Snug, not gorilla-tight.
- Closing the wall too soon: Always run a full pressure test with joints exposed. Ten patient minutes beats ripping out drywall next week.
A related trap: if your real problem was just a clogged or scaled shower head and not the valve at all, you might be replacing the wrong part entirely. Before assuming the valve is the culprit for weak flow, it’s worth ruling out a limescale-choked head — the reasoning in our article on the shower head Ziploc bag descaling trick can save you an unnecessary valve job.
FAQ
Can I install a shower handle valve without turning off the main water supply?
Sometimes. If your shower valve has integral stops — small screwdriver-slotted shutoffs inside the trim behind the escutcheon — you can close just the shower and leave the rest of the house running. If there are no integral stops, you must shut off the house main. When in doubt, shut off the main; it takes two minutes and prevents a soaked bathroom.
How much does it cost to install a shower handle valve myself versus hiring a plumber?
DIY parts run about $15–$60 for a cartridge, $25–$80 for a trim kit, or $60–$150 for a full valve body. A plumber typically charges $150–$400 for a cartridge or trim job and $400–$800+ for a full valve-body replacement that involves opening the wall. If it’s a straightforward cartridge swap, doing it yourself saves the most money with the least risk.
How do I know which shower cartridge to buy for my valve?
Match the brand and model. Look for a logo or part number stamped on the trim, handle, or old cartridge. Cartridges are proprietary — Moen, Delta, Kohler, Pfister, and others each use different shapes and won’t interchange. The safest method is to pull the old cartridge and bring it to the store as a physical match, or photograph the markings before shopping.
Why does my shower still drip after I replaced the cartridge?
Usually one of three things: the cartridge wasn’t seated fully, the retaining clip isn’t in place, or you bought a generic cartridge that doesn’t seal precisely against your valve body. Occasionally the valve body’s internal seat is worn or scaled, in which case cleaning the seat with vinegar or replacing seats-and-springs (on Delta-style valves) solves it. Re-check seating first before assuming the body is bad.
Do I need a pressure-balanced or thermostatic valve, and is it worth upgrading?
If your current valve is an old two- or three-handle setup with no anti-scald protection, upgrading to a pressure-balanced (Type P) or thermostatic (Type T) valve is worth it — it stops the scalding temperature swings when water is used elsewhere in the house, and it’s what modern plumbing codes require for new installations. For a simple like-for-like repair on an existing modern valve, you don’t need to upgrade; just replace the cartridge.
How long does a shower valve cartridge last before it needs replacing again?
A quality manufacturer-matched cartridge typically lasts 10–20 years. Hard water shortens that lifespan because mineral scale attacks the O-rings and seats — homes with very hard water may see 5–8 years. Using silicone plumber’s grease on installation and periodically descaling helps you reach the longer end of that range.
A Note on Expertise, Testing, and Warranty
Author note: This guide was written by the faucitta fixtures team, drawing on hands-on shower valve replacements across Moen, Delta, Kohler, and Pfister systems in both copper and PEX homes. We install, fail, and re-test these procedures on real fixtures rather than paraphrasing spec sheets.
Brand credibility: faucitta (faucitta.net) specializes in faucets, shower systems, and bathroom fixtures. Our recommendations favor parts that meet ASME A112.18.1 / CSA B125.1 fixture standards and anti-scald requirements (ASSE 1016 for pressure-balanced and thermostatic valves), because a valve that meets those standards is one you can trust behind a wall. Whenever you buy a replacement cartridge or valve body, register it and keep the receipt — most reputable manufacturers back cartridges and valve bodies with limited lifetime warranties, and that coverage often includes free replacement cartridges if you can prove the original purchase. Always confirm your specific model’s warranty terms before you install, since altering or using non-OEM parts can void coverage.
Install carefully, test with the wall open, and match your parts to your brand — do those three things and installing a shower handle valve is well within reach for a confident DIYer.