If you’re trying to figure out how to remove kitchen faucet with u shaped bracket hardware, you’ve probably already crawled under the sink, spotted a curved metal piece hugging the faucet shank, and wondered why it isn’t just a normal round nut. Good news: that U-shaped bracket (plumbers also call it a horseshoe bracket, quick-mount clip, or C-clip) is actually one of the easier mounting systems to remove — once you know which two fasteners to loosen and in what order. Below I’ll walk you through the whole job the way I’d explain it to a friend standing next to me with a flashlight in their mouth.
This guide covers the exact tools, the step-by-step removal, the mistakes that strip threads or crack a sink, and how to tell a U-bracket mount apart from the older jam-nut style so you don’t waste 20 minutes wrenching on the wrong thing.
What exactly is a U-shaped bracket on a kitchen faucet, and why does my faucet use one?
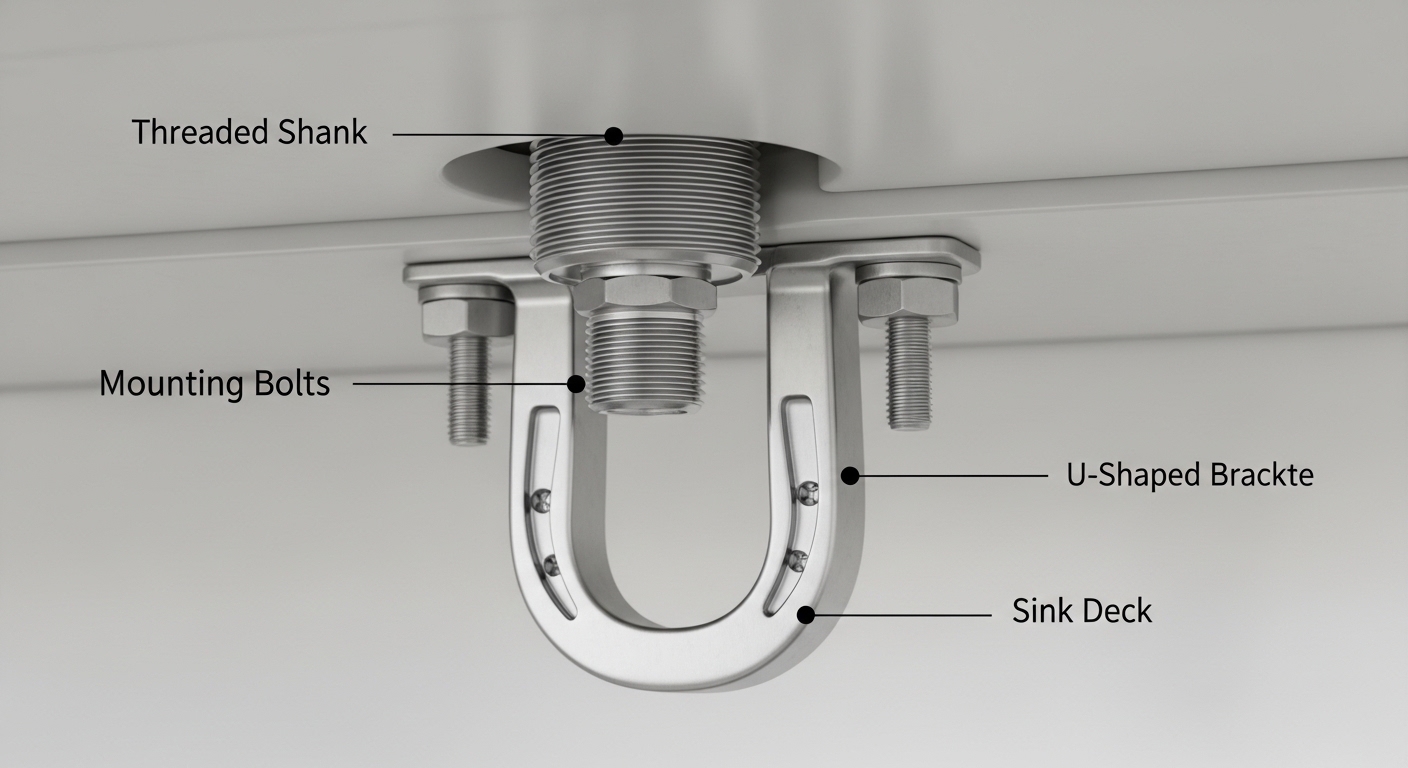
A U-shaped bracket is a horseshoe-shaped metal plate that slides horizontally around the faucet’s center shank and gets pulled tight against the underside of the sink by one or two bolts. Instead of threading a big round nut up a long shank in a cramped cabinet, you just slip the open “U” around the tailpiece and snug two bolts — much faster in tight spaces.
Manufacturers love this design because it makes installation fast and beginner-friendly. Brands like Moen (their “Duralock” and Press & Seal-style mounts), Delta, Kohler, and Glacier Bay all use variations of the quick-clip or horseshoe bracket on mid-range and newer faucets. The trade-off: because the bracket only grips from below, over years of use the bolts can loosen (a wobbly faucet base is the classic symptom) or corrode, which is often exactly why you’re under there removing it.
There are two common variants you’ll meet:
- Two-bolt horseshoe bracket — a flat U-plate with a bolt on each leg. You loosen both bolts; the plate drops.
- Single quick-mount clip — a spring-steel U-clip that snaps over a groove, sometimes with one thumb-screw. You squeeze or unscrew and it pops off.
Either way, the removal logic is identical: relieve the clamping force, slide the U out sideways, lift the faucet up and out.
What tools do I need to remove a kitchen faucet with a U shaped bracket?
For most U-bracket faucets you need a basin wrench, an adjustable wrench or a 3/8″ and 7/16″ socket, a bucket, and a towel — that’s genuinely it for the removal itself. Here’s the full kit I’d lay out before starting so you’re not crawling back out mid-job:
- Basin wrench — the long-handled tool with a spring-loaded jaw, for reaching bracket bolts crammed at the back of the sink.
- Adjustable wrench or socket set (3/8″ and 7/16″ cover most bracket bolts and supply nuts).
- Phillips and flat screwdriver — some quick-clips use a thumb-screw or a small set screw.
- Bucket + old towels — the supply lines and faucet body always hold leftover water.
- Penetrating oil (WD-40 or PB Blaster) for corroded bolts.
- Headlamp or flashlight — non-negotiable in a dark cabinet.
- Optional: putty knife to break the caulk/plumber’s putty seal on top.
A basin wrench is the single tool that turns this from a knuckle-scraping nightmare into a 30-minute job. If you’re planning more faucet work down the road, it’s worth buying one for around $12–$20.
How do I actually remove the faucet step by step?
Shut off the water, disconnect the supply lines, loosen the two bracket bolts, slide the U-bracket out, and lift the faucet from the top — in that order. Rushing the water shut-off is the one mistake that turns a clean job into a flooded cabinet, so let’s do it properly.
Step 1 — Turn off the water and relieve pressure
Reach under the sink and turn both shut-off valves (hot and cold) clockwise until they stop. Then turn the faucet handle on to release trapped pressure and drain the lines. If your shut-offs are seized or missing, close the home’s main water valve instead. Confirm the flow has actually stopped before you disconnect anything.
Step 2 — Disconnect the supply lines
Place your bucket and towel under the connections. Using the adjustable wrench (hold the valve steady with a second wrench so you don’t twist it), unthread the supply line nuts where they meet the faucet’s tailpieces or the shut-off valves. Expect a little water to dribble out — that’s normal. If your faucet has a pull-down sprayer, also disconnect the hose quick-connect and the weight, if fitted.
Step 3 — Locate and loosen the U-shaped bracket bolts
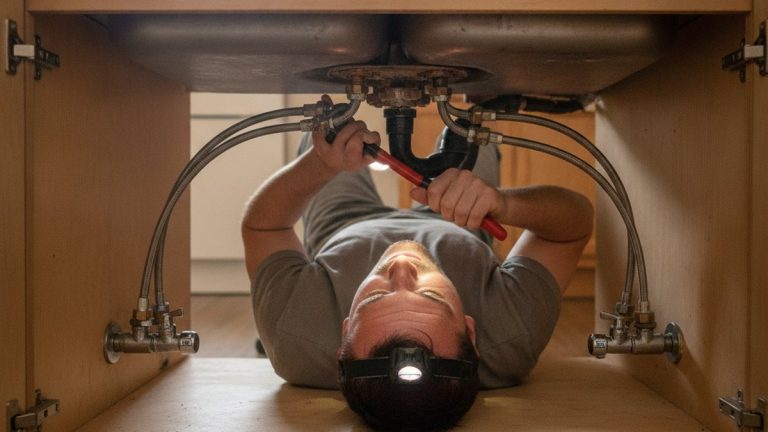
Now the main event. Look up at the underside of the sink deck. You’ll see the U-shaped bracket pressed flat against the sink, with a bolt threaded through each leg of the “U” (or one center bolt on single-clip designs). Using your basin wrench or socket, turn each bolt counter-clockwise. Loosen them evenly — a few turns on one, a few on the other — so the bracket releases squarely instead of cocking sideways and binding.
Step 4 — Slide the bracket off and lift the faucet out
Once the bolts are backed off enough that the bracket is loose, slide the open end of the “U” horizontally off the faucet shank. It should come away in your hand. With the clamping force gone, go up top, break any caulk or plumber’s putty seal around the base with a putty knife, and lift the faucet straight up and out of the mounting hole. If it resists, it’s just the old sealant — wiggle gently, don’t yank.
Step 5 — Clean the deck
Scrape off the old putty, gunk, and any rust ring on the sink deck with the putty knife, then wipe with a rag and a little vinegar. A clean, flat surface is essential if you’re installing a new faucet — old debris causes leaks and rocking.
That’s the entire job. If you’re doing this specifically because your faucet wobbles or leaks at the base and you plan to reinstall the same unit, the same steps run in reverse — and it’s a great moment to check whether you actually need a new faucet or just a fresh cartridge. If the dripping is at the spout rather than the base, our guide on doing a faucet cartridge replacement without calling a plumber may save you the whole removal.
How is a U-bracket mount different from the old jam-nut style?
A U-bracket mount clamps from below with a slide-on horseshoe plate and bolts, while the older style uses a large round jam nut (or wing nut) threaded all the way up the shank. The practical difference is which tool you reach for and how long it takes. Here’s a side-by-side so you know what you’re dealing with before you slide under there:
| Feature | U-Shaped Bracket (Quick-Mount) | Traditional Jam Nut |
|---|---|---|
| How it holds | Horseshoe plate clamped by 1–2 bolts | Large threaded nut against the sink |
| Main tool | Basin wrench or 3/8″ socket | Basin wrench (long reach essential) |
| Typical removal time | 10–20 minutes | 20–40 minutes |
| Common on | Moen, Delta, Kohler, Glacier Bay (newer) | Older & budget faucets pre-2010 |
| Failure mode | Bolts loosen → wobbly base | Nut corrodes/seizes onto shank |
| DIY difficulty | Easy | Moderate |
If you get under the sink and find a big round nut instead of a horseshoe plate, you’ve got the traditional style — the steps are similar, but you’ll spend more time working the basin wrench up in that tight space, and penetrating oil becomes almost mandatory on older seized nuts.
Why won’t the bracket bolts budge, and how do I free a corroded one?
If the bracket bolts won’t turn, they’re almost always corroded or over-torqued — spray them with penetrating oil, wait 10–15 minutes, and try again with steady pressure rather than sudden force. Under-sink hardware lives in a damp environment for years, so a little rust locking the threads is the number-one reason people get stuck on this job.
Work through these in order:
- Soak it. Apply PB Blaster or WD-40 to the bolt threads and let it wick in for 10–15 minutes. Reapply if needed.
- Get better leverage. A 6-point socket grips a rounding bolt head far better than an open adjustable wrench. Switch to a socket if you’re slipping.
- Tap it. A few light taps with the wrench handle can shock rust loose before you turn.
- Go slow and steady. Sudden jerking rounds off the bolt head. Smooth, firm counter-clockwise pressure wins.
- Last resort — cut it. If a bolt is truly seized, a mini hacksaw blade or a rotary tool (Dremel with a cutting wheel) will slice through the bracket or bolt. Wear eye protection and protect the sink surface.
One caution specific to horseshoe brackets: because the plate is thin, people sometimes over-tighten a wrench and crack it. If the bracket itself shatters, that’s fine when you’re removing anyway — just fish the pieces out. If you’re preserving the faucet, buy a replacement mounting kit (usually $8–$15 from the manufacturer).
Do I need to replace anything before installing a new faucet?
Once the old faucet is out, replace the supply lines and check the shut-off valves — those two cheap parts cause the most callbacks after a faucet swap. Braided stainless supply lines cost a few dollars and age out; reusing brittle 10-year-old lines is asking for a slow leak behind the cabinet.
Here’s a quick pre-install checklist while you’ve got clear access:
- Swap in fresh braided stainless steel supply lines sized to your new faucet’s connections.
- Test the shut-off valves — if they’re stiff, drip, or won’t fully close, replace them now while the area is open.
- Confirm your new faucet’s hole configuration (single-hole vs. 3-hole/8″ spread) matches your sink, or plan for a deck plate.
- Check whether the new unit is also a U-bracket mount — most modern ones are, which makes reinstall a breeze.
Choosing the replacement is its own decision. If you’re weighing a reliable, budget-friendly swap, our roundup of the best budget Moen kitchen faucet under $200 covers models that use exactly this quick-mount bracket system. And if your only real complaint was a worn-out sprayer, a pull-out kitchen faucet hose replacement might fix the problem without removing the whole faucet at all. Not sure whether you even need a full replacement versus a repair? Our overview of how to choose the right single-handle faucet for a sink helps you decide before you buy.
How long does this take, and when should I just call a plumber?
For a standard U-bracket faucet in good condition, budget 30–45 minutes start to finish; call a plumber only if the shut-off valves are seized, the bolts are hopelessly corroded, or you find hidden water damage in the cabinet. This is genuinely one of the most DIY-friendly plumbing jobs out there — the U-bracket design was created precisely to make it approachable.
Reasons to hand it off to a pro:
- Shut-off valves won’t close and you can’t safely stop the water.
- You discover corroded or leaking pipes, not just faucet hardware.
- The sink is a fragile material (fireclay, certain composites) and cutting a seized bolt risks cracking it.
- You simply aren’t comfortable working in the tight space — no shame in that.
For everyone else, a basin wrench and a bit of patience will get the job done for the cost of a coffee.
FAQ
Can I remove a kitchen faucet with a U shaped bracket without a basin wrench?
Sometimes, yes. If the bracket bolts face downward and you can reach them, a 3/8″ socket on a ratchet with an extension often works better than a basin wrench. But for bolts tucked at the back of the sink, a basin wrench’s long reach is hard to beat. In a pinch, a pair of long-nose locking pliers can grip a stubborn bolt, though it’s slower.
Which way do I turn the U-bracket bolts to loosen them?
Counter-clockwise (“lefty-loosey”) when you’re looking up at the bolt head from under the sink. Loosen both bolts a little at a time so the bracket releases evenly rather than jamming at an angle. Once they’re backed off, the horseshoe plate slides straight off the shank.
My faucet still wobbles after tightening the bracket — what’s wrong?
A persistent wobble usually means the bracket bolts have bottomed out, the mounting hole is oversized, or the rubber/plastic gasket under the faucet base has compressed and hardened. Loosen everything, add a fresh gasket or a metal mounting washer, re-seat the faucet, and re-tighten the bracket bolts evenly. If the sink deck itself is thin stainless, a bracing washer spreads the load and stops flexing.
Do I need plumber’s putty or silicone when I reinstall?
It depends on the faucet. Many modern faucets come with their own rubber gasket and need no putty at all. If yours doesn’t, apply a thin bead of silicone or a rope of plumber’s putty under the base to keep water from seeping into the mounting hole. Check the manufacturer’s instructions — using putty on a faucet designed for a gasket can void the warranty.
What’s the difference between a horseshoe bracket and a quick-connect clip?
They’re closely related. A horseshoe (U-shaped) bracket is a flat plate clamped by bolts against the sink. A quick-connect clip is a spring-steel piece that snaps into a groove, often with no tools or just a single thumb-screw. Both share the “slide it on sideways, clamp from below” concept, and both remove by relieving the clamping force and sliding the piece off horizontally.
Will removing the faucet drain water everywhere?
Only a small amount. After you shut the valves and open the faucet to relieve pressure, the lines still hold a bit of standing water — maybe a cup — that spills when you disconnect the supply nuts. A bucket and towel under the connections catches it. There’s no big flood as long as the shut-off valves actually closed.
Author note: This guide was written by the Faucitta fixtures team, drawing on hands-on installation and removal of hundreds of residential kitchen faucets across every major mounting system. We’ve clamped, unclamped, and occasionally cut our way through more horseshoe brackets than we can count.
About Faucitta: Faucitta designs and supplies kitchen and bath faucets built to North American plumbing standards. Our kitchen faucets are tested for durability and finish wear against ASME A112.18.1 / CSA B125.1 performance benchmarks, are lead-free compliant, and are backed by a limited lifetime warranty on function and finish. We publish these guides so DIYers can install and maintain fixtures with confidence.