The article is written. Here it is as a complete HTML fragment:
If your outdoor spigot has started dripping, an outdoor faucet washer is the first and cheapest thing to check — long before you think about replacing the whole hose bibb. The washer is the little sealing disc that gets pressed against the valve seat every time you shut the water off, and it’s a wear part by design. Rubber hardens, cracks, and flattens over a few seasons of hot summers and freezing winters, and once it can’t seal, you get that maddening drip that runs your water bill up and, in cold climates, invites a frozen split. The good news: this is one of the most beginner-friendly plumbing fixes there is, and a single washer costs less than a cup of coffee.
Below, we’ll walk through exactly what these washers are, how to identify the right size and type for your faucet, when a new washer will fix the problem versus when it won’t, and how to replace one step by step. We’ll also cover frost-free (freeze-proof) sillcocks, which hide their washer at the far end of a long stem and trip a lot of homeowners up.
What exactly is an outdoor faucet washer, and where is it hiding?
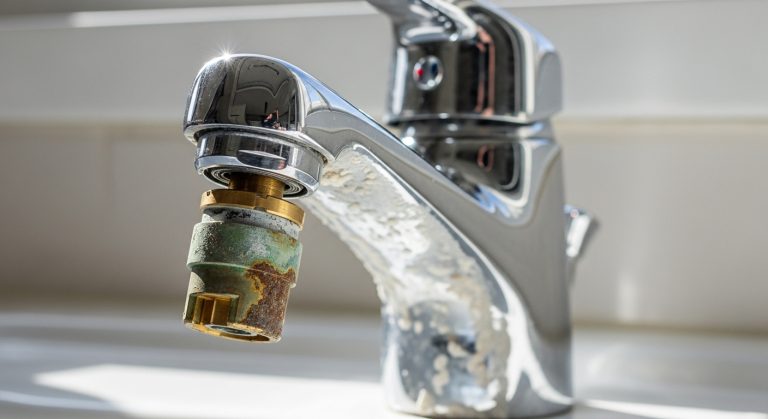
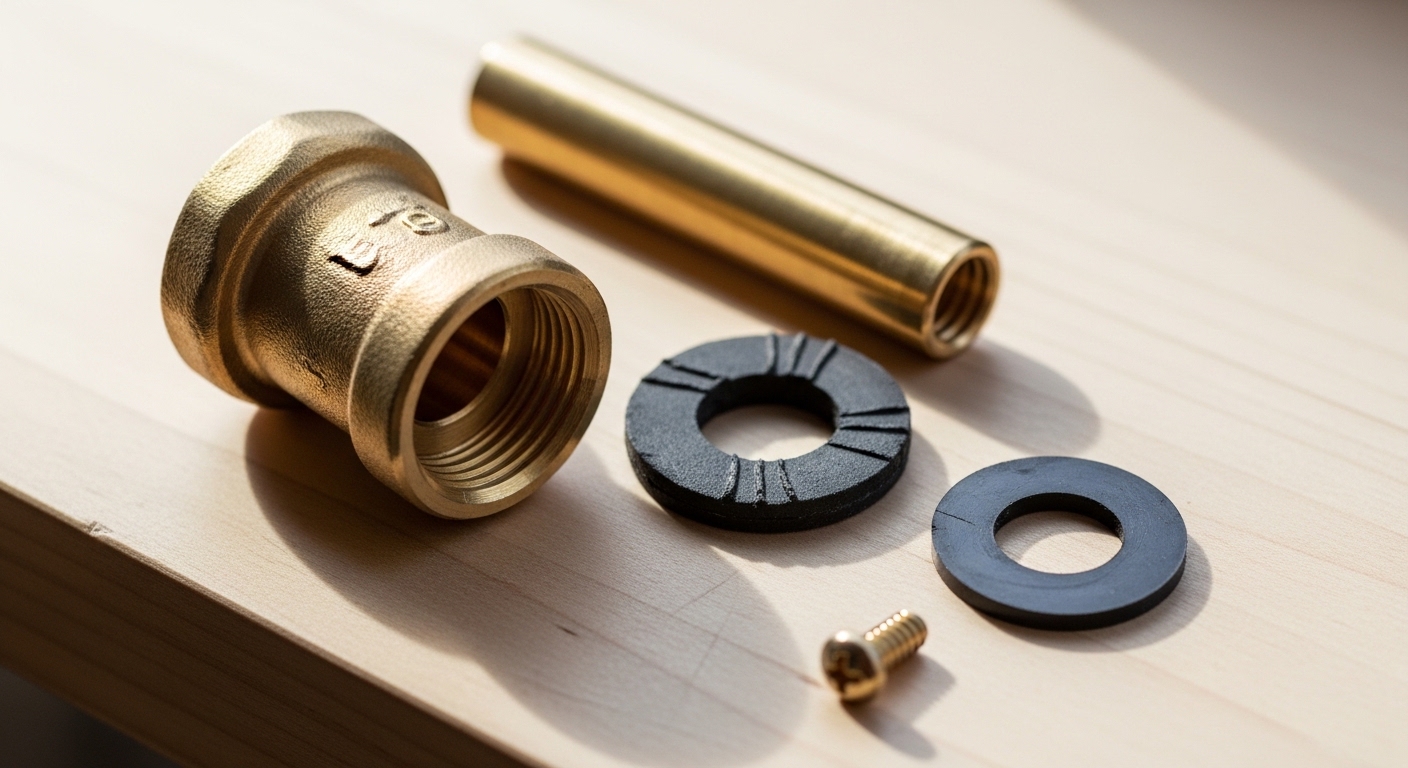
An outdoor faucet washer is a flat or beveled disc — usually EPDM rubber, sometimes nylon or fiber — held to the bottom of the valve stem by a small brass screw. When you turn the handle to “off,” the stem screws down and presses that washer flat against the metal valve seat inside the faucet body, blocking the water. It’s the actual seal. The handle, the packing nut, the stem threads — those all just exist to drive that one washer onto that one seat.
On a standard hose bibb, the washer sits at the very tip of the stem, so you’ll see it the moment you unscrew the packing nut and pull the stem out. On a frost-free (frost-proof) sillcock — the long-bodied outdoor faucet common in cold climates — the washer is at the end of a stem that can be 6, 8, 10, or 12 inches long, because the actual valve is buried back inside your heated wall where it won’t freeze. Same washer, same job, just a longer trip to reach it. This is worth knowing before you start, because pulling an 8-inch stem out of a frost-free faucet looks alarming the first time if you’re expecting a short one.
There are actually two washers in most of these faucets, and people forget the second one:
- The seat washer (bibb washer) — the one at the tip of the stem that stops the drip from the spout. This is what fails most often.
- The packing washer (or packing/O-ring) — up near the packing nut, which stops water from leaking around the handle when the faucet is running. If water squirts out around the handle when the hose is on, that’s your packing, not your seat washer.
Why is my outdoor faucet dripping — is it really just the washer?
Nine times out of ten, yes — a spigot that drips from the spout when it’s fully shut off has a worn seat washer, and a new one fixes it. Rubber washers compress and harden over time, and a hard, cracked, or grooved washer can’t conform to the valve seat anymore, so a thin trickle sneaks past. Replacing the washer restores the seal.
But there’s an important exception. If you’ve already swapped the washer and it still drips, the problem has moved to the valve seat — the metal ring the washer presses against. Over years, a failing washer lets grit and mineral-laden water erode or pit that seat, and a perfectly good new washer can’t seal against a rough, scored surface. In that case you either dress the seat smooth with a seat-grinding tool, replace the seat if it’s the removable type (you’ll see a square or hex hole in the middle of it, meaning a seat wrench can back it out), or replace the whole faucet. Diagnosing this early matters — the same instinct helps with an indoor mystery like a bathroom faucet valve that’s stuck and won’t turn, where the fix also lives inside the valve rather than at the handle.
Quick diagnostic guide by symptom:
- Drips from the spout when fully off → worn seat washer (replace it first).
- Leaks around the handle only when running → worn packing washer / packing nut needs snugging.
- Still drips after a new washer → pitted or scored valve seat.
- Water sprays from the wall / faucet body on a frost-free unit → likely a cracked internal tube from a freeze; that’s a full replacement, not a washer.
What size outdoor faucet washer do I need, and how do I tell?
The most common outdoor faucet washers are the flat “00” and “1/2-inch” sizes, but the only reliable way to get it right is to pull the old washer out and match it — by outer diameter, thickness, and shape (flat vs. beveled). Bring the old washer, still on its screw, to the hardware store, or measure its outer diameter with calipers or a ruler. Most homeowners just buy an assorted washer kit for a few dollars and pick the one that matches; the kit pays for itself the first time.
Two shapes matter. A flat washer is a plain disc and seals against a flat seat. A beveled washer has an angled edge and seals against a tapered seat — using a flat washer where a beveled one belongs (or vice versa) is a common reason a “new washer” still drips. Match the shape, not just the diameter.
| Washer type | Typical size | Best for | Material |
|---|---|---|---|
| Flat seat washer “00” | ~3/8″ OD | Older standard hose bibbs, compression faucets | EPDM / rubber |
| Flat seat washer “1/2” | ~1/2″ OD | Larger hose bibbs & sillcocks | EPDM / rubber |
| Beveled seat washer | 3/8″–1/2″ | Faucets with tapered/angled seats | Rubber or nylon |
| Frost-free stem washer | Model-specific | Freeze-proof sillcocks (long stem) | Nylon or EPDM |
| Packing washer / O-ring | Varies | Sealing around the handle/stem | Graphite-impregnated / rubber |
One caveat on frost-free faucets: many brands (Woodford, Prier, Mansfield, Aqua-Puro and others) use a proprietary stem washer or a full stem-repair kit rather than a generic disc. Note the brand and model stamped on the faucet before you buy, or take the whole stem to the store. A generic “00” washer forced onto a brand-specific stem is a frequent cause of a repair that doesn’t take.
How do I replace an outdoor faucet washer step by step?
You can replace an outdoor faucet washer in about 15 minutes with an adjustable wrench, a screwdriver, and a new washer — no plumber required. Here’s the whole process:
- Shut off the water to the spigot. Find the shutoff valve on the supply line inside (often in a basement, crawlspace, or utility area) and close it. Then open the outdoor faucet to drain any pressure and leftover water.
- Loosen the packing nut behind the handle with your adjustable wrench, turning counterclockwise. Hold the faucet body steady so you don’t twist it in the wall.
- Unscrew the stem out. With the packing nut loose, turn the handle as if opening the faucet — the whole stem assembly threads out. On a frost-free unit, keep going; the stem is long.
- Remove the old washer. Undo the small brass screw at the tip of the stem, pop off the flattened old washer, and note its size and shape.
- Install the new washer of the matching size/shape and re-tighten the retaining screw snugly (a hardened or corroded screw can be worth replacing too).
- Inspect the seat. Shine a light inside; if the seat looks pitted or rough, dress or replace it now while you’re in there.
- Reassemble in reverse, snug the packing nut (firm, not gorilla-tight — over-tightening makes the handle stiff), restore the water, and test. No drip means you nailed it.
If you’re the type who likes to fix the small stuff yourself, that same confidence carries over to jobs like a pull-out kitchen faucet hose replacement — different fixture, same “shut off, disassemble, swap the worn part, reassemble” rhythm.
Should I just replace the whole outdoor faucet instead of the washer?
Replace the washer first — it’s cheap, fast, and fixes the vast majority of drips. Only step up to a full faucet replacement when the washer swap doesn’t hold, when the valve seat is damaged beyond a quick dressing, when a frost-free unit has a cracked internal tube from freezing, or when the faucet body itself is corroded and leaking. If you’re replacing anyway, that’s the moment to consider upgrading to a quarter-turn ceramic-disc hose bibb or a quality frost-free sillcock, both of which are far more drip-resistant than the old rubber-washer compression design.
Here’s the honest cost math. A washer is roughly $0.25–$3. A repair kit with washers, screws, and packing runs $5–$12. A new standard hose bibb is $10–$25; a quality frost-free sillcock is $25–$60. Labor, if you hire a plumber, is usually $100–$250 regardless of which part fails — which is exactly why learning to swap the washer yourself is worth it. For a broader look at how build quality separates fixtures that last from ones that nickel-and-dime you, our guide to the best faucet brands for a kitchen lays out the same durability principles that apply to outdoor bibbs.
| Situation | Best fix | Rough cost (DIY) |
|---|---|---|
| Drips from spout, seat looks smooth | New seat washer | $1–$5 |
| Leaks around handle | New packing washer/O-ring | $2–$8 |
| Drips after new washer, seat pitted | Dress or replace seat | $8–$20 |
| Frost-free stem worn | Brand stem-repair kit | $10–$30 |
| Cracked body / froze / heavy corrosion | Replace whole faucet | $10–$60 |
How do I keep the washer from wearing out again so fast?
Wear is normal, but you can stretch a washer’s life a lot with three habits: don’t crank the handle shut (gentle firm pressure seals fine and over-tightening grinds the rubber), disconnect garden hoses before winter so trapped water can’t freeze against the seal, and shut off and drain outdoor lines in fall if you don’t have frost-free faucets. Hard water is the silent killer here — mineral scale builds on the seat and chews through washers — so if your area has hard water, expect to replace washers a little more often and consider a ceramic-disc bibb that shrugs off grit.
A frost-free sillcock is the best long-term upgrade in any climate that sees a freeze. Because its valve seals back inside the warm wall and the faucet body drains itself when closed, there’s no standing water to freeze at the washer, and the seal simply lasts longer. Just remember to remove hoses in winter — a connected hose defeats the self-draining design and can still cause a freeze split.
FAQ
How much does an outdoor faucet washer cost?
Almost nothing — an individual washer is about $0.25 to $3, and an assorted washer kit with several sizes plus screws is usually $3 to $8. Even a full hose-bibb repair kit with washers, packing, and O-rings tops out around $12. The cost is your time, not the part.
Can I use any rubber washer for my outdoor faucet?
No. It has to match the original in outer diameter, thickness, and shape (flat vs. beveled). A washer that’s too small won’t seal and one that’s too big won’t seat properly, and using a flat washer on a tapered seat (or vice versa) will still drip. Frost-free faucets often need a brand-specific stem washer or kit rather than a generic disc, so check the brand and model first.
Why does my outdoor faucet still drip after I replaced the washer?
The valve seat — the metal ring the washer presses against — is probably pitted or scored, so even a brand-new washer can’t seal against it. Dress the seat smooth with a seat-grinding tool, replace it if it’s the removable type, or replace the whole faucet. The same “fix moved deeper into the valve” logic applies indoors too, like when a bathroom valve gets stuck.
What’s the difference between the seat washer and the packing washer?
The seat washer sits at the tip of the stem and stops the drip from the spout when the faucet is off. The packing washer sits up near the packing nut and stops water from leaking around the handle when the faucet is running. Different location, different job — match the symptom to the right washer.
Do frost-free (frost-proof) outdoor faucets have washers too?
Yes. A frost-free sillcock has the same seat washer, just at the end of a long stem (6–12 inches) so the actual valve sits inside your heated wall where it won’t freeze. Many frost-free brands use a proprietary stem washer or full stem-repair kit, so note the brand and model — often stamped on the faucet — before buying a replacement.
How often should I replace my outdoor faucet washer?
There’s no fixed schedule — replace it when it starts to drip, which for a rubber washer is typically every few years, sooner in hard-water or freeze-prone areas. Gentle shut-off pressure, removing hoses before winter, and upgrading to a ceramic-disc or frost-free faucet all extend how long a washer lasts.
The bottom line
An outdoor faucet washer is the humblest, cheapest part in your plumbing and the single most common reason a spigot drips. Before you call a plumber or buy a new faucet, shut off the water, pull the stem, and swap that little disc for a matching one — flat or beveled, the right diameter, plus a fresh packing washer while you’re in there. If it still drips, the fix has simply moved to the valve seat. Master this 15-minute repair and you’ll never overpay for a dripping spigot again.
About the author: This guide was written by the faucitta fixtures team, drawing on hands-on hose-bibb and sillcock repairs across both mild and hard-freeze climates. About faucitta: faucitta designs and supplies kitchen, bath, and outdoor faucets and fixtures, and our products are built to standard NSF/ANSI and ASME A112.18.1 sealing and material benchmarks, bench-tested for cycle durability, and backed by our replacement-parts warranty so a worn washer never means a whole new faucet. Always follow your faucet manufacturer’s instructions and local plumbing codes; when in doubt, consult a licensed plumber.