

If you’re renovating a tub and keep seeing “sold separately” next to a good-looking spout, here’s the plain truth: a roman tub valve and trim kit is really two purchases that work as one. The valve (also called the rough-in or rough valve) is the brass or engineered-polymer body that gets plumbed in and buried under your tub deck before the surface is finished. The trim is everything that shows above the deck — the wide spout, the hot/cold handles, the escutcheons, and on most roman setups a pull-out hand shower. Buy one without the other and you’ve got either a working water source with nothing to turn it on, or a beautiful faucet with nothing behind it.
What exactly is a “roman tub” filler, and how is it different from a regular tub spout?
A roman tub filler is a deck-mounted faucet — it sits on the flat rim (the deck) around a drop-in or undermount tub, not on the wall. That’s the core difference. A standard tub spout pokes out of a tiled wall and screws onto a nipple or slips over copper; a roman filler’s spout rises up through a hole drilled in the tub deck and connects to a valve that lives in the cavity underneath.
Roman fillers exist because a lot of big soaking tubs, garden tubs, and freestanding-style drop-ins have no wall behind them to hang a spout on. They also move a lot more water. A wall spout might run 4–6 gallons per minute (GPM); a true roman filler is often designed for high flow — frequently 12–18 GPM or more on the valve — so a deep tub actually fills before the water goes lukewarm. That high-flow requirement is exactly why the valve is a separate, beefy component and not just a stub-out.
- Wall-mount tub spout: mounts on tiled wall, low flow, simple connection.
- Roman (deck-mount) filler: mounts on the tub rim, high flow, needs a dedicated rough-in valve below deck.
- Freestanding floor-mount filler: rises from the floor on a tall riser — a cousin of the roman filler for standalone tubs. If that’s your setup, see our guide to the best freestanding tub faucet floor-mount Delta model.
Why are the valve and trim sold separately — isn’t that just annoying?
They’re split on purpose, and it actually works in your favor once you understand it. The valve gets installed during the rough-in plumbing stage — before the deck is tiled or the stone top is set — and then it’s inaccessible. The trim goes on last, after the finished surface is done, so it never gets scratched, grouted over, or damaged by construction.
Splitting them also lets you change the look without touching the plumbing. Ten years from now you can swap a chrome trim for a matte black one and never open the wall or deck — same valve, new trim. It’s the same logic behind shower systems: the plumber sets the guts once, and the design lives on the surface. That modularity is genuinely useful, but it comes with one hard rule.
How many holes does a roman tub valve and trim kit need in my deck?
Most roman tub trim kits are a 3-hole or 4-hole configuration, and you need to know which before you drill anything. The hole count comes from how many separate pieces poke through the deck.
| Configuration | Holes | What’s on the deck | Best for |
|---|---|---|---|
| 2-hole | 2 | Single-handle mixer + spout | Compact decks, modern minimalist look |
| 3-hole (classic) | 3 | Spout + two handles (hot/cold) | Traditional roman tubs, most common |
| 4-hole (with hand shower) | 4 | Spout + two handles + hand shower | Deep soakers, rinsing, cleaning the tub |
Standard center-to-center spread for a 3-hole roman filler is often around 8–12 inches, but it varies by model, so measure your existing holes (or plan new ones) against the exact spec sheet of the kit you want. The deck thickness matters too: valves are rated for a maximum deck thickness (commonly up to ~2–2.25 inches for stone or built-up decks). A thick granite or quartz top can exceed a valve’s reach unless you buy an extension kit — check that number before you fall in love with a 3 cm slab.
What’s actually inside a roman tub valve, and what does the trim include?
Here’s what you’re paying for on each side, so you can read a spec sheet without guessing.
The valve (rough-in) typically includes:
- A brass or high-strength polymer body with hot and cold inlets (usually 1/2″ copper, PEX, or IPS connections).
- Deck-mount shanks or legs that anchor the spout and handle bodies to the deck.
- The high-flow diverter or mixing chamber, and on 4-hole kits, the diverter that sends water to the hand shower.
- Sometimes a plaster guard / test cap so you can pressure-test the plumbing before the trim goes on.
The trim kit typically includes:
- The decorative spout (the wide arc that pours into the tub).
- Handle(s) — cross, lever, or knob — with the cartridges or stems that control flow and temperature.
- Escutcheons / base plates that cover the deck holes.
- The hand shower, hose, and cradle on 4-hole kits.
- The visible finish (chrome, brushed nickel, matte black, brushed gold, etc.).
Note that the working cartridge can live in either half depending on the brand — some put ceramic-disc cartridges in the trim handles, others in the valve. This matters for repairs later: when a roman filler drips, you’re usually replacing a cartridge or stem, not the whole assembly. If you’ve dealt with a dripping tap before, the process rhymes with replacing a faucet stem — shut off the supply, pull the handle and bonnet, swap the worn part, reassemble.
Can I replace just the trim and keep my existing valve?
Sometimes — but only if the new trim is compatible with the valve already in your deck. This is the single most common roman-tub question online, and the honest answer is “it depends on what’s buried under there.” If your existing valve is a current-generation model from a major brand and still in good shape, buying a matching trim-only kit is a great, low-mess upgrade: no demolition, just a fresh finish and new handles.
Where people get burned is assuming any trim fits any valve. It doesn’t. Before ordering trim-only:
- Identify the valve brand and model — look for a stamp on the body, or check the original paperwork.
- Confirm the trim kit explicitly lists that valve as compatible (brands publish trim-to-valve charts).
- Measure the deck spread and hole count so the new escutcheons cover the old holes.
- Check the finish across all pieces — a “brushed nickel” spout and handle should come from the same kit so the tone matches exactly.
If you can’t identify the valve, or it’s leaking from the body rather than a cartridge, replace both. Digging out a mystery valve to force-fit a modern trim is the fast route to a callback plumber. And if the whole tub plumbing is aging, it may be smarter to redo it properly — our walkthrough on how to replace bathtub faucet plumbing yourself covers doing it without flooding the bathroom.
How much does a roman tub valve and trim kit cost, and where does the money go?
Budget realistically. Because you’re buying two components plus (usually) professional deck access, a roman filler is not a cheap fixture — but the range is wide.
| Tier | Valve + trim price range | What you get |
|---|---|---|
| Budget | $120–$250 | Polymer or light-brass valve, 3-hole trim, basic chrome, shorter warranty |
| Mid-range | $250–$600 | Solid-brass valve, ceramic-disc cartridges, 4-hole with hand shower, popular finishes, lifetime finish/function warranty |
| Premium | $600–$1,500+ | Heavy brass high-flow valve, designer finishes (matte black, brushed gold), lifetime warranty, name-brand trim families |
A few things worth paying up for: a solid-brass valve body (survives hard water and heat cycling far better than thin metal or plastic), ceramic-disc cartridges (drip-resistant for years), and a real lifetime warranty on finish and function from a brand that stocks replacement cartridges. If your area has hard water, the finish and cartridge quality matter even more — the same logic we cover in our guide to the best bathroom faucet for hard water applies to tub fillers too, since mineral scale is what kills cheap cartridges and clouds cheap finishes first.
How do I install a roman tub valve and trim kit — rough sequence?
The valve goes in during construction; the trim goes on at the end. Here’s the honest sequence so you know what you’re signing up for.
- Plan the deck holes to match your kit’s spread and hole count before the surface is set.
- Mount and plumb the valve below deck: connect hot and cold 1/2″ supplies, secure the body to the underside, and keep the plaster guard on.
- Pressure-test with the test cap before closing anything up — this is the step that prevents a hidden leak inside your deck cavity.
- Finish the deck (tile, stone, or solid surface).
- Install the trim: set the spout, handles, and hand shower onto their shanks, seat the escutcheons, install cartridges, and tighten set screws.
- Test flow and temperature, check for leaks at every connection, and confirm the diverter sends water to the hand shower.
Access is the real question. If your tub deck has a removable access panel or the underside is reachable, a confident DIYer can handle the trim and even the valve. If the deck is sealed stone with no access, plan for a plumber — because getting the valve wrong there means cutting into an expensive surface.
FAQ
Is a roman tub valve and trim kit the same as a tub filler?
Basically, yes — “roman tub filler” is the finished faucet, and it’s made of the valve plus the trim. When a listing says “trim only,” it means you still need a compatible rough-in valve. When it says “complete kit,” both halves are included. Always read which parts are in the box.
Can I mix a valve from one brand with trim from another?
Not reliably, and we don’t recommend it. Trim is engineered to fit a specific valve’s shanks, stem length, and thread pattern. Mismatched brands lead to spouts that wobble, handles that don’t reach the cartridge, or escutcheons that don’t cover the deck holes. Stay within one brand’s matched valve-and-trim system.
How many holes will I need to drill in the tub deck?
Most roman kits are 3-hole (spout + two handles) or 4-hole (add a hand shower). Some single-handle models use 2 holes. Check your specific kit’s spec sheet for exact hole count and center-to-center spread before drilling, and confirm your deck thickness is within the valve’s rated range.
Why is water coming out slowly from my roman tub filler?
Low flow usually means a clogged aerator or spout screen, a partially closed supply valve, or scale buildup inside the cartridge — common with hard water. It can also mean the valve was undersized for the tub. Clean or replace the aerator first; if flow is still weak, inspect the cartridge and confirm both supply stops are fully open.
What finish should I choose for a roman tub trim?
Match it to your other bathroom fixtures for a coherent look. Chrome and brushed nickel are the safest, most forgiving with water spots; matte black and brushed gold look striking but show fingerprints and require the same finish across every piece. Whatever you pick, buy the whole trim from one kit so the tone is identical. For broader finish guidance, our roundup of the best bath faucet brands compares how different makers hold their finishes over time.
Do I really need the hand shower, or is 3-hole enough?
You don’t need it, but the hand shower earns its keep on deep soaking tubs — it makes rinsing hair, bathing kids or pets, and cleaning the tub far easier. If you have the deck space and a diverter-equipped valve, the 4-hole kit is a small upcharge for a lot of daily convenience. For a compact deck or minimalist look, 3-hole is perfectly fine.
A note on sourcing, testing, and warranty
Author note: This guide was written by faucitta’s fixtures team, drawing on hands-on installs of deck-mount tub fillers and years of fielding the same questions from renovators and plumbers. We’ve seen every version of the “I bought the pretty spout but no valve” mistake, and this article exists to save you that trip back to the store.
Brand credibility: faucitta specializes in faucets and bathroom fixtures, and we evaluate roman tub systems the way our customers actually use them — full-tub fill tests for flow, cartridge cycling for drip resistance, and finish inspection under hard-water conditions. When you buy a valve and trim, look for products certified to recognized plumbing standards (such as ASME A112.18.1 / CSA B125.1 for faucet performance and NSF/ANSI 61 for materials in contact with drinking water) and backed by a manufacturer’s lifetime warranty on finish and function. Those standards and that warranty are your real protection — a buried valve should never be the cheapest part of the job.
类似文章

How Do You Handle a Bathtub Faucet Handle Replacement Without Calling a Plumber?
A bathtub faucet handle replacement is a 20–40 minute DIY job: shut off the water, pop the decorative cap, unscrew the handle screw, pull the old handle off…
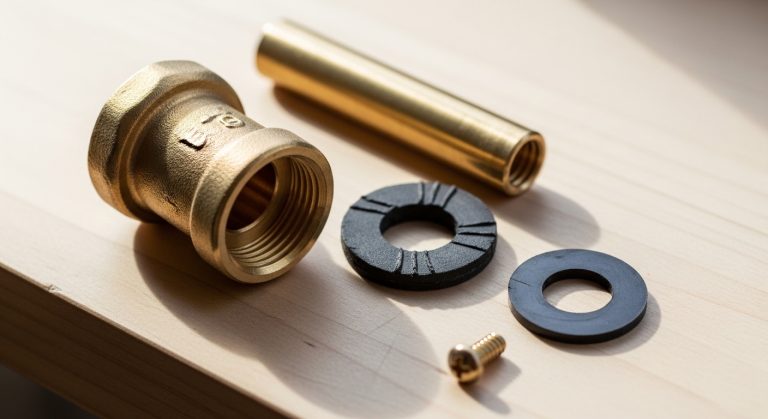
What Is an Outdoor Faucet Washer, and Which One Do I Need to Stop My Spigot From Dripping?
An outdoor faucet washer is a small rubber or nylon disc inside your hose bibb (outdoor spigot) that seals against the seat when you close the valve; a…

Wall Mount Faucet vs Regular Deck Faucet: Which One Should You Actually Buy?
A wall mount faucet mounts through the wall above your sink and frees up the deck for a cleaner look and easier cleaning, while a regular (deck-mount)…

Is an Oil Rubbed Bronze 4 Inch Faucet the Right Pick for My Bathroom?
An oil rubbed bronze 4 inch faucet is the right pick if you have a sink with two pre-drilled holes spaced 4 inches apart (centerset) and want a warm, dark,…

What Is the Best Single Handle Faucet for a Sink, and How Do I Choose One?
A single handle faucet sink mounts through one hole and uses one lever to control both temperature and flow — making it the easiest faucet to install, use,…

Is a Centerset Bathroom Faucet Single Handle the Right Choice for Your Sink in 2026?
A centerset bathroom faucet single handle is the best pick when your sink has three pre-drilled holes spaced 4 inches apart and you want simple one-lever…