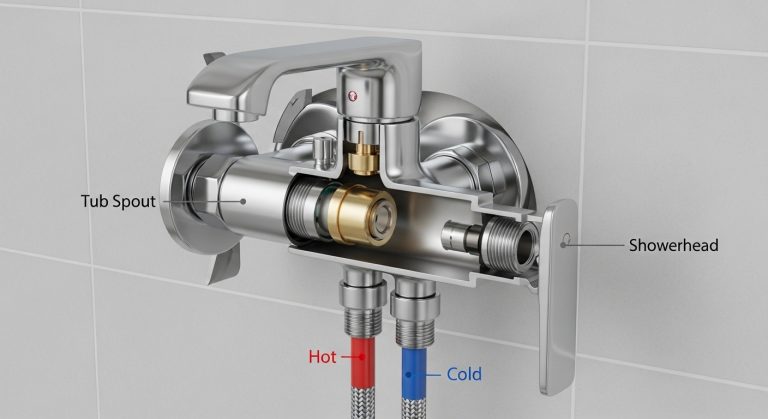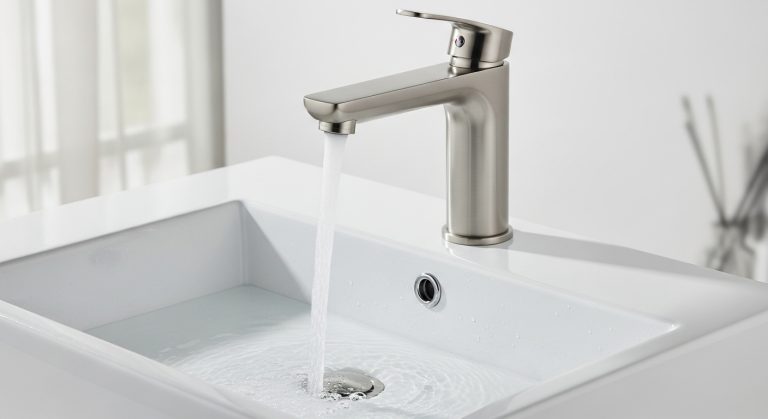
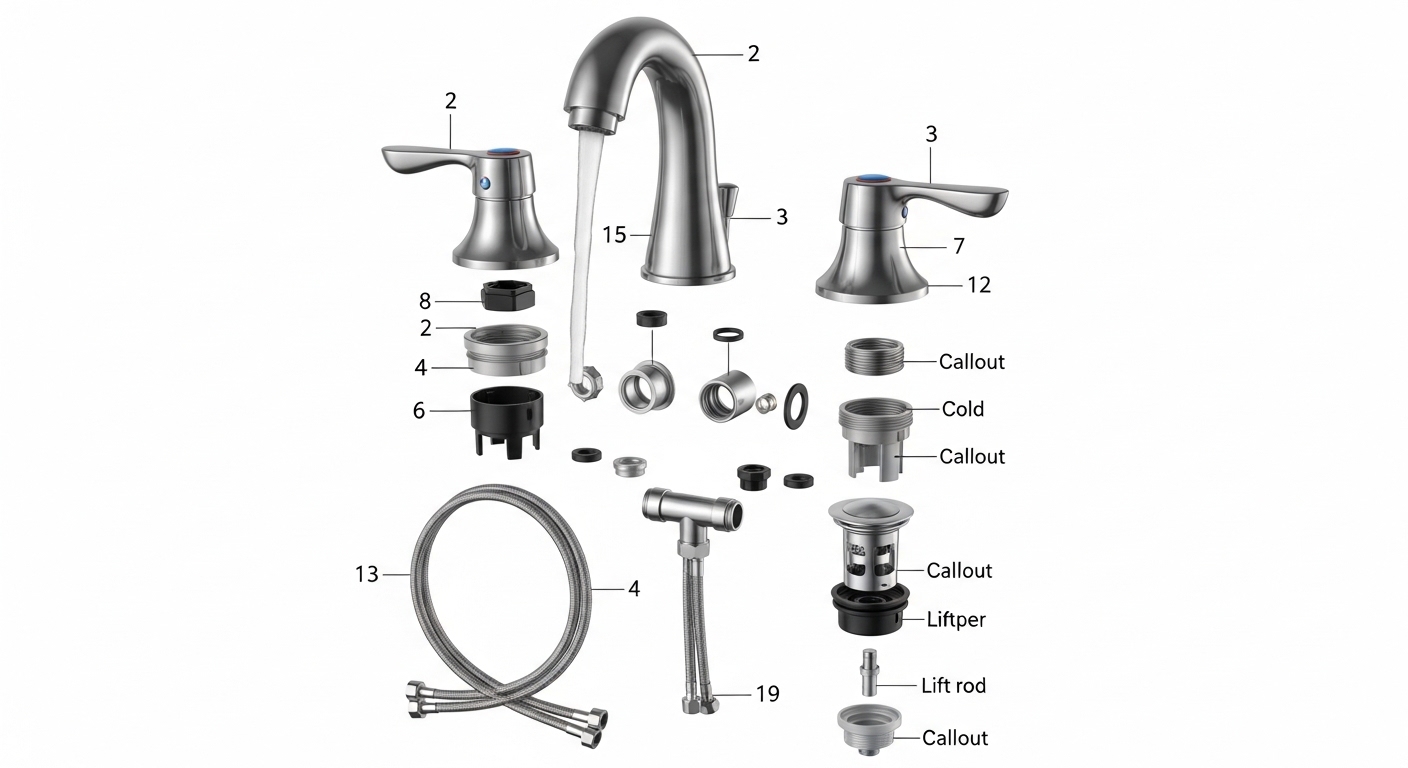
If you’ve ever stood in front of your sink with a dripping handle, a loose spout, or an Amazon cart full of faucets you’re not sure will fit, a clear bathroom faucet diagram is the single most useful thing you can look at. It turns a confusing tangle of brass, rubber, and chrome into a labeled map: this is the cartridge, this is the escutcheon, this is the shank, this is the lift rod for your pop-up drain. Once you can name the parts, ordering a replacement, troubleshooting a leak, or measuring your sink for a new faucet becomes a five-minute job instead of a weekend headache.
At Faucitta, we sell, install, and service bathroom fixtures every day, and the number-one buyer mistake we see isn’t picking the wrong finish — it’s misreading the diagram and ordering a 4-inch centerset for an 8-inch widespread sink, or a quarter-turn ceramic cartridge for a faucet that uses a compression stem. This guide walks you through exactly what a bathroom faucet diagram shows, the three configurations you need to recognize on sight, the parts that fail and how to spot them, and the measurements you must take before you click “buy.”
What exactly is a bathroom faucet diagram, and why does every plumber and DIYer use one?
A bathroom faucet diagram is a labeled drawing — usually an “exploded view” — that pulls every component of the faucet apart visually so you can see how the pieces stack, thread, and seal together. Manufacturers print one in every installation manual. Plumbers keep them on their phones. Hardware-store employees pull them up to identify your mystery part.
You’ll see two main styles of diagram:
- Exploded view — the faucet is “blown apart” along a vertical axis so each washer, O-ring, and nut is shown in the order it stacks. Best for ordering replacement parts.
- Cutaway view — the faucet is sliced in half so you can see water flow paths, valve seats, and how the cartridge sits inside the body. Best for understanding how it works and where it leaks.
Most homeowners only need the exploded view. The numbered callouts (1, 2, 3…) match a parts list with SKUs, so you can walk into any plumbing supply house, point at “part #14,” and walk out with the exact replacement.
What are the main parts shown on a bathroom faucet diagram?
Every bathroom faucet, whether it’s a $39 builder-grade single-handle or a $600 widespread, breaks down into the same eight functional groups. Once you memorize these, every diagram becomes readable.
| Part | What it does | Common failure | Typical replacement cost |
|---|---|---|---|
| Spout | Delivers water to the basin | Mineral buildup, finish wear | $25–$120 |
| Handle(s) | Controls flow and temperature | Loose set screw, cracked plastic insert | $8–$40 |
| Cartridge / valve | Mixes hot and cold, controls flow | Dripping, hard to turn | $15–$60 |
| Aerator | Mixes air into water, sets flow rate (1.2 GPM standard) | Clogged with sediment | $3–$15 |
| Escutcheon / deck plate | Covers extra holes on 3-hole sinks | Rarely fails; finish wear | $15–$45 |
| Mounting nut & washer | Secures faucet to sink deck | Loosens over time | $5–$10 |
| Supply lines (hot & cold) | Connect faucet to shut-off valves | Cracked braiding, leaks at nut | $8–$20 each |
| Pop-up drain assembly | Lift rod opens/closes the stopper | Stopper won’t seal, lift rod sticks | $20–$60 |
If your faucet is dripping from the spout when the handle is fully off, the diagram tells you it’s almost always the cartridge or the seats-and-springs underneath it — not the whole faucet. That’s a $20 fix, not a $200 replacement.
How do I know if I have a single-hole, centerset, or widespread faucet?
This is the single most important thing the diagram (and your sink) tells you, because it determines what you can buy. Flip the faucet off, look under the sink, and count the holes drilled in the sink or vanity top.
- Single-hole — one hole in the deck. One unit handles everything: spout, mixer, handle. Common on modern vessel sinks and small powder rooms.
- Centerset (4-inch) — three holes spaced 4 inches center-to-center. The spout and two handles are mounted on one base plate. The most common configuration in American homes built 1970–2005.
- Widespread (8-inch) — three holes spaced 8 to 16 inches apart. Spout and handles are three separate pieces connected underneath by hot/cold supply tubes and a T-fitting. Common in higher-end or remodeled bathrooms.
- Wall-mount — no deck holes; the faucet body is in the wall. Used with vessel sinks or freestanding tubs.
A widespread faucet diagram will show the under-deck plumbing — two valve bodies, two flex lines feeding a T, then up to the spout. A single-hole diagram is much simpler: one valve body, one cartridge, one shank. If you’re shopping, knowing which one you have eliminates 70% of the catalog instantly. Our buyer’s guides for finishes — like the stainless steel faucet with black sink pairing guide — assume you’ve already nailed down the configuration first.
What kind of valve or cartridge does my faucet use, and why does it matter?
The cartridge is the heart of the faucet, and it’s the part you’re most likely to replace. There are four common types, and a good bathroom faucet diagram will name yours so you can buy the right one. Get this wrong and the faucet either drips forever or won’t turn off at all.
| Cartridge type | How to recognize it | Life expectancy | Best for |
|---|---|---|---|
| Ceramic disc | Quarter-turn handle, very smooth feel | 20–30 years | Modern faucets, hard-water areas |
| Compression | Handle keeps turning, uses rubber washer | 5–10 years (washers fail) | Older two-handle faucets pre-1990 |
| Ball valve | Single handle, slotted metal ball inside | 10–15 years | Older single-handle Delta-style faucets |
| Cartridge (sleeve) | Pull-out cylindrical insert with O-rings | 10–20 years | Moen, Price Pfister single-handle |
Ceramic disc is the modern default and what we install in almost every Faucitta faucet — they’re tested to 500,000 on/off cycles per NSF/ANSI standards, which is roughly 30 years of normal household use. If your current faucet drips after you shut it off and the handle has more than 90 degrees of travel, you almost certainly have a compression valve, and the diagram will show two rubber washers and brass seats inside the stem. Those are wear parts; replace them for under $5 each.
For tubs specifically, the cartridge anatomy is a little different — pressure-balancing and thermostatic models add a piston or wax element. We break that down in our bathtub faucet valve cartridge guide if your project includes the tub too.
How do I use a diagram to fix a dripping or leaking bathroom faucet?
Pull up the exploded diagram for your specific model (the brand name is stamped under the spout or on the cold handle), then match the leak location to the part:
- Drip from the spout when shut off → cartridge, seats, or springs (parts labeled #6–#9 on most diagrams). Shut off the angle stops under the sink, pop the handle, unscrew the bonnet nut, pull the cartridge straight up, take it to the store, match it, reinstall in reverse. 20-minute job.
- Leak at the base of the spout → O-rings on the spout shank (usually #4 and #5). On widespread faucets, the spout lifts straight off after you remove the set screw.
- Drip under the sink at the supply line → braided flex hose or the compression nut at the angle stop. Hand-tight plus a quarter-turn with a wrench; never gorilla-grip these.
- Pop-up stopper won’t hold water → the rubber seal at the bottom of the stopper or the pivot rod has slipped. The diagram shows the lift rod, clevis strap, and pivot ball — pop the pivot ball back in and tighten the retaining nut.
- Brown or rusty water from one tap only → sediment in the aerator. Unscrew it (counterclockwise looking up at it), rinse the screen, reinstall. If the water is rusty from both taps, you have a supply-side issue we cover in our rusty water out of faucet diagnostic.
One pro tip: before you take anything apart, photograph each step with your phone. The diagram tells you the order of parts; your photo tells you the orientation. Together they prevent the “wait, which way did that washer face?” panic.
What measurements should I take from the diagram before I buy a new bathroom faucet?
Before you order anything, get five numbers in writing. The diagram of the faucet you’re considering will list these as specs; your existing sink and plumbing have to match.
- Hole spacing — 4″ centerset or 8″ widespread, measured center-to-center of the outer holes.
- Maximum deck thickness — usually 1.5″–2.25″. Thick stone vanities can exceed this; check the mounting shank length.
- Spout height — from deck to highest point. 5″ works for a standard bowl; vessel sinks need 10″–14″.
- Spout reach — from base of spout to center of aerator. Should land within the bowl, not behind the drain.
- Supply connection — most are 3/8″ compression. Standard US shut-offs match this; check anyway.
One more spec you’ll see on the diagram and box: flow rate. Federal standard since 2024 is 1.2 GPM at 60 psi for residential bathroom faucets in most states; California and Colorado are 1.2 GPM statewide. A diagram that lists 2.2 GPM is either a kitchen faucet or doesn’t meet WaterSense — don’t install it in a bathroom unless you want to fail inspection.
What finish does the diagram tell me, and how do I choose one that lasts?
The diagram itself is finish-neutral, but the spec sheet attached to it lists the finish code (PVD chrome, brushed nickel, matte black, brushed gold, oil-rubbed bronze, etc.) and the finish standard it meets. Look for ASME A112.18.1 / CSA B125.1 compliance and a PVD (physical vapor deposition) coating — these are roughly five times more scratch- and corrosion-resistant than electroplated finishes and carry lifetime finish warranties from most reputable brands, Faucitta included.
If you’re choosing between finishes, the maintenance reality matters as much as the look. Brushed gold needs gentler care than chrome — soft cloth, no abrasives, no bleach — which we lay out in detail in our brushed gold faucet cleaning guide. Oil-rubbed bronze develops a “living finish” patina, while matte black hides water spots but shows hard-water residue. Pick for your water and your cleaning habits, not just the showroom photo.
Should I install it myself using the diagram, or call a plumber?
Replacing a like-for-like bathroom faucet — same hole configuration, working shut-offs under the sink — is a 45-minute DIY job for anyone comfortable with a basin wrench. The installation diagram in the box walks you through it step by step. Call a pro when:
- You’re changing configurations (centerset to widespread requires a new sink or a deck plate).
- The shut-off valves under the sink are seized or leaking (replace them while you’re in there).
- You have galvanized supply lines that are corroded at the threads.
- The sink is undermount stone and the mounting nuts are inaccessible without removing the bowl.
Average plumber rates in the US run $150–$350 for a straight bathroom faucet swap, more if shut-offs or supply lines need replacement.
FAQ
Where do I find the official diagram for my specific faucet?
Look under the spout or on the cold handle for a brand name and model number. Type “[brand] [model] parts diagram” into Google, or go directly to the manufacturer’s support page. Moen, Delta, Kohler, Pfister, and Faucitta all publish free exploded-view PDFs with part numbers you can order by phone.
Can I use a bathroom faucet diagram to identify an unbranded faucet?
Sometimes. If there’s no brand stamp, measure the cartridge (diameter, length, spline count on the top) and compare it to universal cartridge charts from Danco or Lasco — they sell crossover parts for most generic faucets. Take the old cartridge to the store; matching it physically is faster than guessing online.
Are bathroom faucet parts universal across brands?
Mostly no. Each brand has its own cartridge, O-ring, and seat-spring patterns. Aerators are roughly universal (15/16″–27 male or 55/64″–27 female threads are the two common sizes), and supply lines are standard 3/8″ compression. Cartridges almost never cross brands.
How long should a bathroom faucet last before I need to replace it?
A quality faucet with a ceramic disc cartridge and a PVD finish should last 15–25 years with only an occasional cartridge swap. Builder-grade faucets with electroplated finishes and rubber-washer compression valves typically need replacement at 7–10 years.
Does a bathroom faucet diagram show the drain assembly too?
Usually yes — most faucet diagrams include the pop-up drain components (lift rod, clevis strap, pivot ball, tailpiece, stopper) because they’re shipped with the faucet. The P-trap and waste arm below the tailpiece are shown in a separate “rough-in” diagram, not the faucet diagram itself. For shower and tub rough-in dimensions, see our Moen shower valve rough-in guide.
What’s the difference between a faucet diagram and a rough-in diagram?
A faucet diagram shows the faucet itself — every part above and immediately below the deck. A rough-in diagram shows the in-wall or in-floor plumbing: pipe diameters, valve depth from finished wall, drain center heights. You need the faucet diagram to pick parts; you need the rough-in diagram to build or remodel.
Why does my new faucet have fewer parts in its diagram than my old one?
Modern faucets consolidate. A 1985 two-handle compression faucet had two stems, four washers, four seats, four springs, two bonnet nuts, and two handles. A modern equivalent has one ceramic cartridge per side and is rated for thirty years. Fewer parts, longer life, easier service.
Author note: This guide was written by the Faucitta product team, which has spent over a decade designing, sourcing, and servicing residential bathroom fixtures across the US market. Every faucet we sell is third-party tested to ASME A112.18.1 / CSA B125.1, carries a limited lifetime mechanical and finish warranty, and ships with a full installation diagram and parts list in the box. If you need help identifying a part from a diagram or matching a replacement cartridge, our support team will walk you through it — send a photo of your existing faucet and we’ll tell you exactly which part to order.