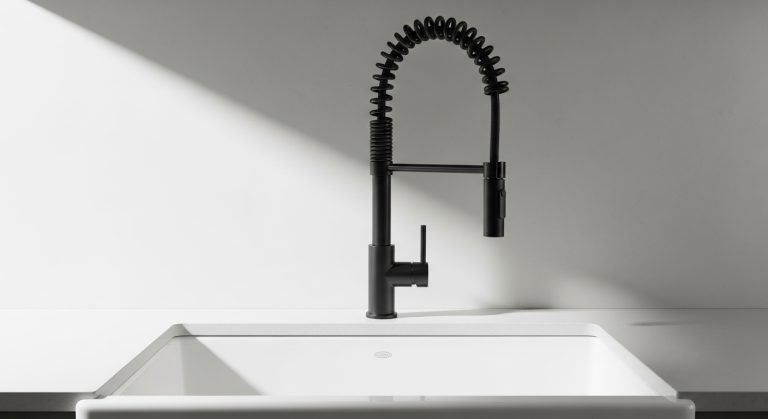
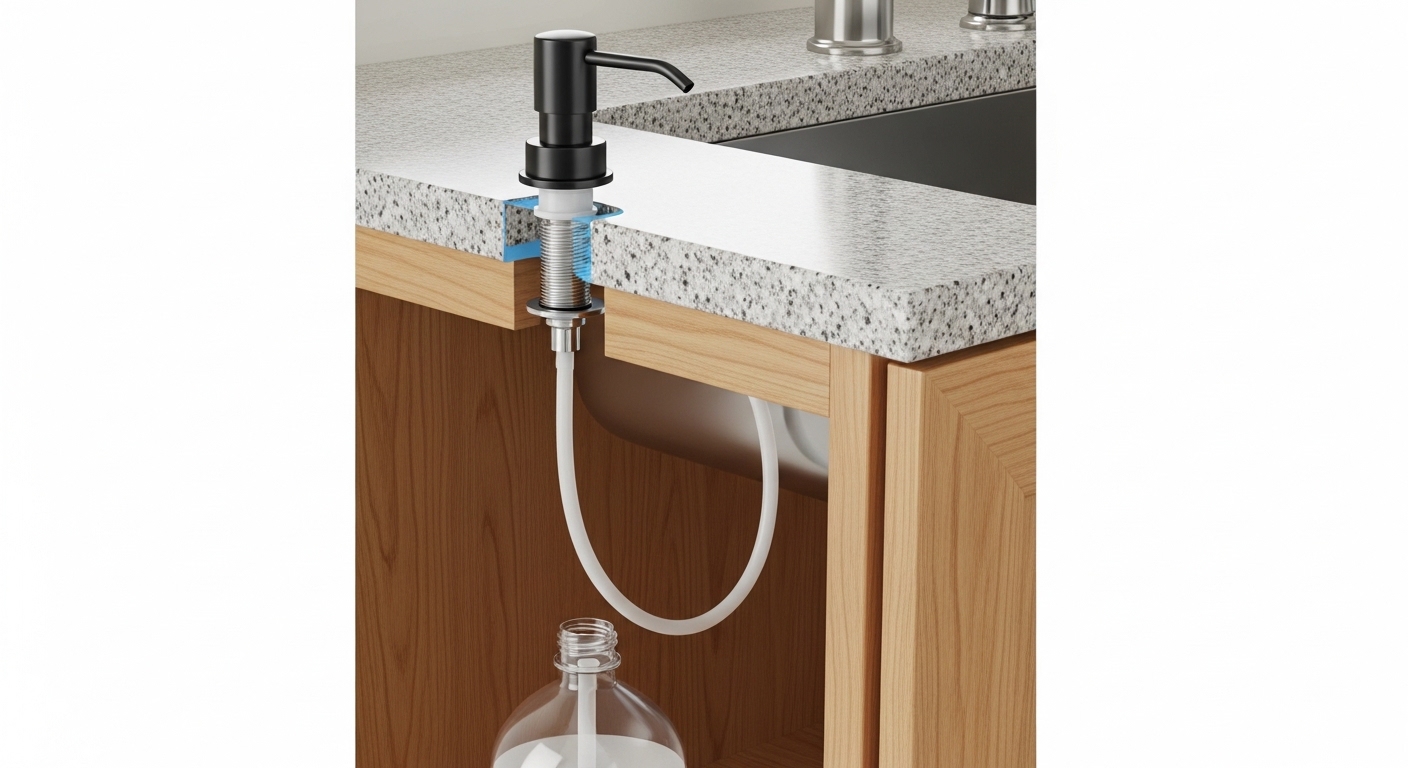
If your kitchen faucet soap dispenser not working has you pumping a limp, air-spitting head that won’t push out a single drop, take a breath — this is one of the most fixable problems on the whole sink. The built-in soap dispenser is a simple mechanical pump connected to a plastic tube that drops into a reservoir bottle under your counter. When it “dies,” the pump itself has usually not failed. Something has interrupted the path between the soap and the nozzle: air in the line, dried soap in the head, or a tube that’s slipped, kinked, or run dry. Below I’ll walk you through exactly how to diagnose which one it is, in the order a plumber would check, so you don’t replace a $25 part you didn’t need to.
Why did my kitchen faucet soap dispenser suddenly stop pumping?
Your dispenser suddenly stopped pumping because it lost its prime — the pump is now moving air instead of soap. This happens the instant the tube’s tip sits above the soap level (an empty or low bottle), the tube gets kinked when you shove things around under the sink, or thick soap has stopped flowing in cold weather. The pump needs a continuous, sealed column of liquid from bottle to nozzle; break that column anywhere and it just wheezes.
Here’s the quick mental model. A soap dispenser pump has a small internal check valve and a spring. Each press pulls liquid up the tube and pushes the previous charge out the nozzle. If air gets into that chamber — because the bottle ran dry even once, or the tube tip is above the soap — the pump compresses air instead of pumping liquid, and nothing comes out. That’s not a defect. It’s exactly how every pump behaves when it “runs dry,” and it’s why re-priming fixes most cases.
The three most common real-world triggers, roughly in the order I see them:
- Empty or nearly empty bottle (about half of all “broken” dispensers). The tube tip is sucking air.
- Clogged nozzle from soap that dried and crystallized in the spout — extremely common if you’ve used the same dish soap for months or switched to a thick, gel-type soap.
- Tube problems — the tube slipped off the pump barrel, kinked behind the bottle, or is too short and no longer reaches the soap.
How do I fix a soap dispenser that pumps but no soap comes out?
If the pump moves freely but nothing comes out, re-prime it: make sure the bottle is at least half full, then press the pump head firmly and fully 15–20 times in a row. You’re pulling the air out of the tube and pump chamber and drawing soap up to replace it. Most air-locked dispensers start flowing within 20 pumps, though a long tube on a deep cabinet can take 30 or more.
Follow this sequence and stop as soon as soap flows:
- Check the bottle. Unscrew the reservoir from under the sink (or lift the top-fill cap if yours fills from above) and confirm there’s actual soap in it, not a dried crust. Fill it two-thirds full with fresh soap.
- Dilute thick soap. If you use a heavy gel or concentrated soap, cut it with 20–30% warm water and stir. Thick soap is the #1 reason a good pump still won’t prime — it simply can’t climb the narrow tube.
- Re-prime. Pump firmly 15–20 times. Feel for the resistance to change from “airy and loose” to “firm with a little push-back” — that’s soap arriving in the chamber.
- Prime with water if it’s stubborn. Pour a little warm water directly down the nozzle from the top, then pump. Water primes faster than soap and pulls the soap up behind it.
If after 30 firm pumps you still get nothing but air, the problem isn’t priming — move on to the nozzle and the tube.
How do I unclog a crystallized soap dispenser nozzle?
To unclog the nozzle, unscrew the pump head and spout and soak them in a bowl of hot (not boiling) water for 10–15 minutes, then flush the spout under a running tap and clear the tip with a toothpick or a straightened paperclip. Dried soap turns into a hard, waxy plug right at the nozzle tip and inside the spout’s elbow — hot water dissolves it in minutes, and you’ll often see a cloudy swirl come off as it lets go.
Step by step:
- Unscrew the pump head counter-clockwise from the top of the sink. On most dispensers the whole head-and-spout assembly lifts off the shank; on others the spout unclips from the head.
- Soak the head and spout in hot water. Add a splash of white vinegar if there’s hard-water scale mixed with the soap — vinegar dissolves the calcium that soap clings to.
- Run hot water backward through the spout to blow the softened plug out the way it came in.
- Poke the nozzle tip and the internal channel with a paperclip to break any remaining crust.
- Reassemble and re-prime with warm water as above.
Prevention matters here: the nozzle crystallizes fastest when soap sits unused (a guest bathroom or second sink) or when you use a thick, dye-heavy soap. Diluting your soap and giving the pump a couple of “dry” pumps after a big cleanup — to clear soap out of the spout — keeps the tip from cementing shut.
What if the pump is loose, mushy, or the tube fell off?
If the pump head feels loose, spins, or the plunger stays mushy no matter how much you pump, the tube has almost certainly slipped off the pump barrel or the internal check valve has failed. Reach under the sink, look at the bottom of the pump shank, and confirm the clear vinyl tube is still pushed firmly onto the barrel. A tube that has popped off — or split at the end from age — breaks the seal and the pump can never build suction.
Three things to check under the counter:
- Tube seated on the barrel. Push the tube firmly back onto the pump’s lower nipple. If the tube end is stretched, split, or hardened, snip off the last half-inch with scissors and re-seat the fresh section — or replace the tube entirely with cheap vinyl aquarium tubing of the same diameter.
- Tube length reaching the soap. The tube must reach the bottom of the bottle. If someone replaced the bottle with a taller one, the tube may float above the soap. Add tubing so the tip sits at the bottom.
- Kinks and pinches. A tube pinched behind the reservoir or crushed by a stored cleaning-supply caddy stops flow completely. Straighten it and give the bottle a clear spot to stand.
If the plunger is mushy and won’t spring back even with the tube firmly attached and the bottle full, the pump’s internal spring or check valve is worn out. That’s the one case where the pump head itself needs replacing — and thankfully a universal replacement pump head runs about $8–$25 and screws right onto the existing shank. You don’t replace the whole faucet, and you rarely even touch the countertop hole.
Should I repair or just replace the soap dispenser?
Repair first — it’s free or nearly free, and it fixes the large majority of dispensers. Only replace the pump head (not the whole unit) if the plunger is permanently mushy or cracked, and only replace the full dispenser if the shank or bottle is cracked and leaking under the counter. Here’s how the options actually compare:
| Symptom | Most likely cause | Fix | Typical cost & time |
|---|---|---|---|
| Pumps air, bottle has soap | Lost prime / air lock | Re-prime 15–20 pumps, prime with warm water | $0 · 5 min |
| Pumps but nothing comes out | Clogged/crystallized nozzle | Soak & flush head in hot water | $0 · 15 min |
| Weak, sputtering flow | Thick soap or partial clog | Dilute soap 20–30% with water | $0 · 5 min |
| Loose/mushy plunger, no suction | Tube off barrel or split | Re-seat or replace vinyl tube | $0–$5 · 10 min |
| Plunger dead even when sealed | Worn pump spring/check valve | Replace universal pump head | $8–$25 · 10 min |
| Soap leaking into cabinet | Cracked shank or bottle | Replace full dispenser unit | $20–$40 · 20 min |
The pattern is clear: five of the six problems cost you nothing but a few minutes. Reaching for a whole new dispenser should be your last move, not your first.
How is a built-in soap dispenser related to the rest of my faucet?
Your built-in soap dispenser shares the same deck holes and, often, the same finish family as your faucet — so it’s worth understanding how the whole setup fits together before you start swapping parts. A soap dispenser usually occupies one of the sink’s pre-drilled 1.25″–1.5″ accessory holes, the same hole a side sprayer or air gap would use. If you’re already under there fixing the dispenser, it’s a good moment to check the rest of the sink hardware.
A few connections worth knowing:
- If your pull-out or pull-down spray hose is also acting up, the fix lives in the same cabinet — see our guide on a pull out kitchen faucet hose replacement so you can tackle both in one session.
- If the whole faucet needs to come off to get better access, our walkthrough on removing a kitchen faucet with a U-shaped bracket shows how to do it without scratching the sink.
- Shopping for a replacement faucet that includes a matching soap dispenser? Start with the best budget Moen kitchen faucet under $200 for reliable, easy-to-service options, or read up on the best single handle faucet for a sink if you’re rethinking the layout.
Keeping the dispenser finish consistent with your faucet — brushed nickel, matte black, brushed gold — is the small detail that makes a sink look intentional rather than pieced together over the years.
What kind of soap should I put in a built-in dispenser to keep it working?
Use a thin-to-medium liquid dish soap or hand soap, ideally diluted with 20–30% water — thick gels, foaming-only soaps, and anything with grit or beads will clog the pump. The narrow tube and small check valve inside a deck dispenser are built for free-flowing liquid, not for the honey-thick concentrates that have become popular. Match the soap to the pump and you’ll rarely see a clog again.
Quick soap rules that prevent 90% of repeat clogs:
- Thinner is better. If the soap glugs slowly out of its own bottle, it’s too thick for the dispenser — cut it with warm water.
- Skip foaming soap. Foaming pumps use a completely different air-injection head; standard dispensers can’t foam and will clog trying.
- Avoid exfoliating or “scrubbing” soaps. The beads and pumice jam the check valve.
- Don’t let it run bone dry. Refilling before it fully empties keeps the pump primed so you never have to re-prime at all.
FAQ
Why does my new soap dispenser only pump air even though it’s full?
A brand-new dispenser almost always needs priming — the tube and pump ship full of air. Fill the bottle, then pump firmly 20–30 times, or pour a little warm water down the nozzle first to speed things up. New units with long tubes to a deep cabinet can take 30+ pumps before the first soap appears; that’s normal, not a defect.
Can I use hand soap or dish soap in a kitchen faucet soap dispenser?
Yes to both, as long as it’s a thin-to-medium liquid. Standard liquid dish soap and hand soap work well, especially diluted with a little water. Avoid thick gels, foaming soap, and anything with exfoliating beads — those are the soaps most likely to clog the nozzle and stall the pump.
How do I refill a soap dispenser that fills from the top versus the bottom?
Top-fill models let you pour soap straight down the spout hole on the deck — lift or unscrew the pump head and fill from above, no cabinet crawling needed. Bottom-fill models require you to unscrew the reservoir bottle from under the sink and refill it there. Check which you have by trying to lift the pump head first; if it opens to a funnel, it’s top-fill.
My pump feels stiff and hard to press — is it broken?
A stiff pump usually means dried soap has cemented inside the spout or the plunger, not that the pump is broken. Unscrew the head and soak it in hot water for 10–15 minutes to dissolve the hardened soap, then work the plunger under the water until it moves freely. If it’s still stiff after soaking, the internal spring may be corroded and a $10–$20 universal pump head will fix it.
Do I need to replace the whole faucet if the soap dispenser breaks?
Almost never. The soap dispenser is a separate part that sits in its own sink hole, independent of the faucet’s water lines. Worst case you replace the pump head or the entire dispenser unit for under $40 — the faucet stays put. Only a cracked sink or a countertop issue would ever force a bigger job.
How often should a built-in soap dispenser be cleaned?
Flush the nozzle with warm water every month or two, and do a full hot-water soak of the head whenever you change soap brands or the flow starts to weaken. Dispensers in low-use sinks — a bar sink or guest kitchen — crystallize faster because the soap sits still, so clean those more often even if they look fine.
A note from our team
This guide was written by faucitta’s fixture support team, which handles kitchen and bath hardware questions every day and has walked thousands of homeowners through deck-mounted dispenser fixes over the phone and in writing. faucitta designs and tests kitchen faucets, soap dispensers, shower systems, and bath fixtures to standard North American deck-hole and thread specifications, and our dispenser pumps are cycle-tested and backed by a limited lifetime warranty on the pump mechanism. If a re-prime and a hot-water soak don’t bring your dispenser back, that warranty means a replacement pump head is a quick, no-cost swap — reach out before you assume the whole unit is dead.