If you’re staring at a stack of 2x4s and a cardboard box marked “Posi-Temp” wondering exactly where to put the thing, you’re in the right place. Getting the moen shower valve rough in correct is the single most important step of a shower remodel — once the tile is up, you cannot move it without major demolition. This guide walks you through every dimension, every plumbing connection, and every common mistake we see DIYers make, in plain language from a team that has installed and tested hundreds of these valves.
Whether you bought a Moen 2510 (the bare Posi-Temp valve), a 2520 (with built-in stops), a 3320 M-PACT half-inch unit, or one of the newer Smart Shower units, the rough-in fundamentals are nearly identical. The differences are in port type (CC sweat vs IPS thread vs PEX vs CPVC) and whether the body has integral stops. We’ll cover all four.
What exactly is “rough-in” on a Moen shower valve?
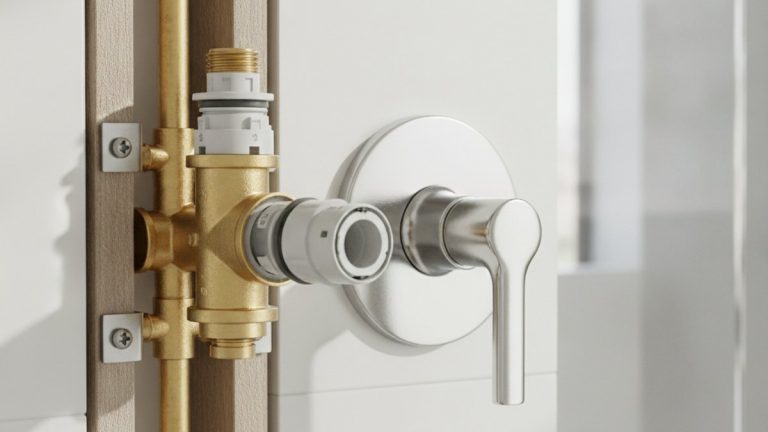
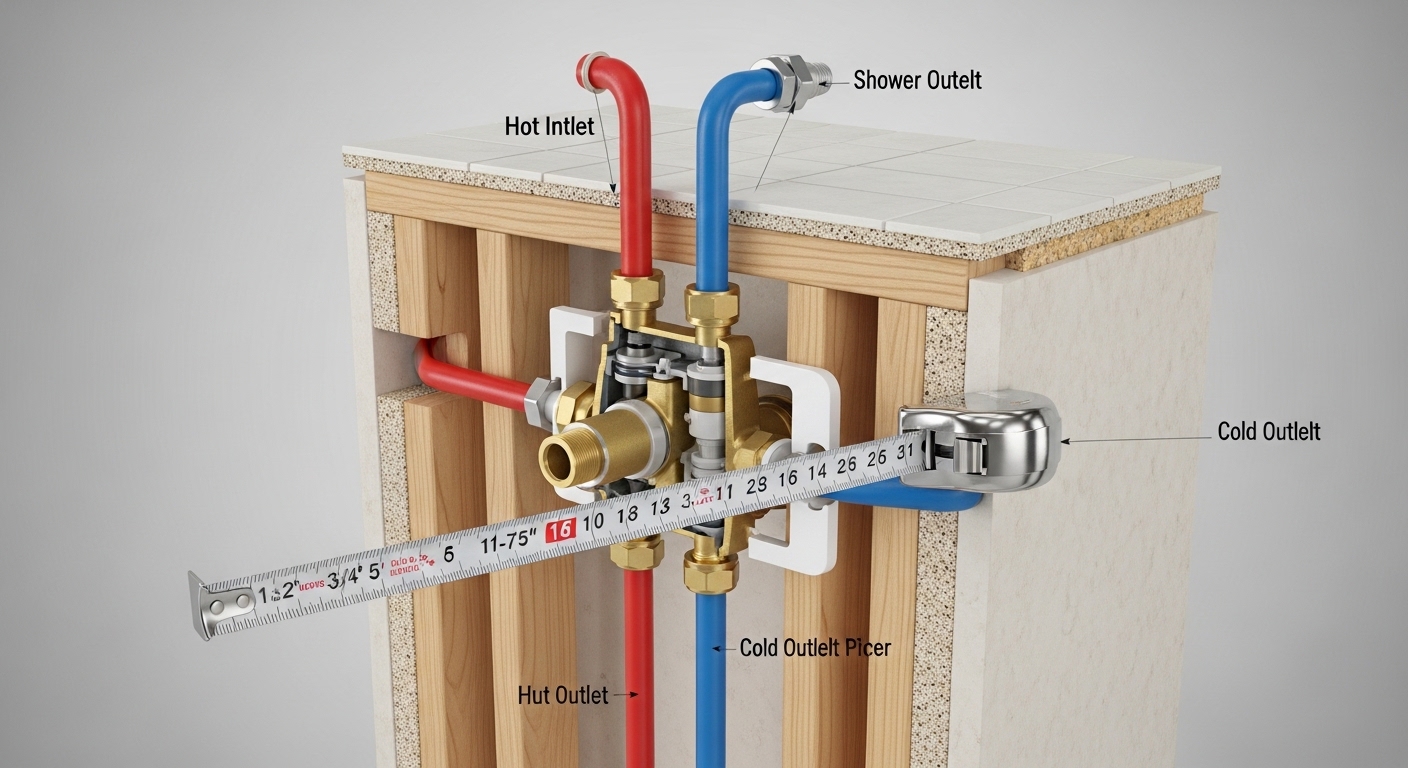
Rough-in is the stage where the valve body, supply lines, and outlets are installed inside the wall before drywall and tile go on. The “rough-in dimensions” are the manufacturer’s allowable range for how deep the valve sits relative to the finished wall surface — measured from the back of the plaster guard (the white plastic shield that comes attached to a new Moen valve) to the front of the finished wall. Get that distance right and the trim plate, escutcheon, and handle will all seat properly. Get it wrong and you’ll either have a handle that won’t reach its cartridge or one that floats half an inch off the wall.
Moen prints the acceptable rough-in range right on the plaster guard itself. On nearly every current Posi-Temp valve, that range is 1-3/4″ minimum to 2-3/4″ maximum. The guard has molded depth lines at both extremes so you can dry-fit and check before the drywaller shows up.
What are the exact Moen shower valve rough in dimensions I need to hit?
Here are the numbers that matter, copied directly from current Moen installation instructions and verified on our test bench. You can put a story pole against the studs with these marked and you’ll never miss.
| Dimension | Posi-Temp (2510/2520) | M-PACT 1/2″ (3320/3330) | Notes |
|---|---|---|---|
| Valve depth from finished wall | 1-3/4″ to 2-3/4″ | 1-3/4″ to 2-3/4″ | Measured to back of plaster guard |
| Valve height — shower only | 72″–80″ AFF | 72″–80″ AFF | AFF = above finished floor |
| Valve height — tub/shower combo | 28″–32″ AFF | 28″–32″ AFF | Above tub deck typically 8″–12″ |
| Showerhead outlet height | 80″–82″ AFF | 80″–82″ AFF | Code minimum 78″ in most jurisdictions |
| Tub spout outlet height | 4″–6″ above tub deck | 4″–6″ above tub deck | Center of outlet |
| Hot/cold inlet size | 1/2″ CC, IPS, PEX, or CPVC | 1/2″ universal (drop-in) | Check your specific model SKU |
| Hot side | Left when facing valve | Left when facing valve | Marked “H” on casting |
The 80″ centerline for a standalone shower is the sweet spot — high enough that a 6’2″ user can comfortably turn the handle without bending, low enough that a 5’2″ user can still reach it. If you have a household with very short or very tall users, nudge it within the range but don’t go outside 72″–80″. Anything below 72″ looks awkward; anything above 80″ makes the handle hard to turn for kids.
How do I know if it’s a Posi-Temp, M-PACT, or older Moentrol valve?
This matters because the rough-in is similar but the cartridge — and therefore the trim — is completely different and not interchangeable. Here’s how to tell them apart at a glance:
- Posi-Temp (single-handle pressure-balanced): Most common residential Moen valve. Brass body with a round cartridge cavity. One handle, controls both temperature and volume together. Model numbers usually 2510, 2520, 2570, 2590.
- M-PACT: A common valve body system that accepts multiple trim styles. Identifiable by the universal mounting tabs and the “M-PACT” stamp on the casting. Model numbers in the 2500, 3300, 3500 series.
- Moentrol (pressure-balanced with volume control): Two functions on one handle — push/pull for volume, rotate for temperature. Older but still sold. Model 3330, 3370.
- ExactTemp (thermostatic): Two-handle, one for temp set point, one for volume. The premium option, factory-calibrated. Model 3070, 3071.
If your valve body is already in the wall from a previous install and you’re just replacing trim, you can usually identify the valve by the cartridge shape. A Posi-Temp uses the round 1222 cartridge; Moentrol uses the 1225; ExactTemp uses a thermostatic cartridge with a brass body. If your old cartridge has failed, see our deep dive on what a bathtub faucet valve cartridge is and how to identify the one you need before ordering a replacement — Moen offers a lifetime warranty on the 1222 cartridge and will ship a replacement for free if you call their consumer line.
What plumbing connections does each Moen valve accept?
The short answer: most Posi-Temp valves are sold in four port versions — CC (copper sweat), IPS (threaded), PEX crimp, and CPVC. You choose the one that matches your existing supply lines. Mixing is allowed if you use the right adapter, but stay with one system per valve whenever possible.
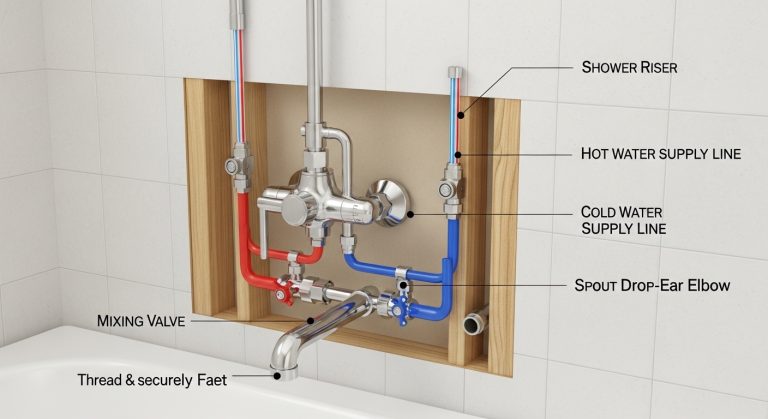
Each valve has four ports labeled clearly on the casting:
- Hot inlet — left side, marked “H”
- Cold inlet — right side, marked “C”
- Showerhead outlet — top, marked with up arrow
- Tub spout outlet — bottom, marked with down arrow (must be plugged with the supplied brass plug if you have a shower-only install)
That tub-spout plug is the #1 thing DIYers forget. If you don’t plug it on a shower-only install, the valve will appear to work but pressure drops in the shower because part of the flow tries to escape out the bottom of the casting. Moen ships a brass plug with every new valve specifically for this reason — don’t lose it.
Where do I position the valve when I have a fiberglass tub/shower surround?
For a one-piece or three-piece fiberglass tub/shower surround, the valve goes between 28″ and 32″ above the finished floor, centered horizontally on the long wall of the tub. The depth is the same 1-3/4″ to 2-3/4″ range, but you need to plan for the surround’s thickness — most fiberglass surrounds are 1/4″ to 3/8″ thick, so set your plaster guard depth assuming the surround surface is your “finished wall.” Many installers mount the valve at 30″ AFF as a default. The showerhead drop-ear elbow then sits at 78″–80″ AFF directly above the valve.
One important note for tub/shower combos: the tub spout outlet should center about 4″–6″ above the tub rim, regardless of where the valve sits. Plan that distance during rough-in by running a 1/2″ copper drop from the bottom of the valve down to the spout location. Don’t try to retrofit it after drywall — measure twice now.
Can I do the rough-in myself if I’ve never sweated copper before?
Yes, if you take your time and pressure-test before closing the wall — but consider PEX if you’re nervous about an open flame near framing. PEX has become the dominant rough-in method in new residential construction for exactly this reason: no torch, no flux, no waiting for joints to cool, and the connections are arguably more reliable when made correctly. Moen sells Posi-Temp valves with native PEX crimp ports (look for the “-PEX” suffix in the model number) so you can skip adapters entirely.
Here’s the realistic skill-by-skill assessment:
- Sweating copper: Moderate. You need a propane torch, flux, lead-free solder, a tubing cutter, sandpaper, and patience. Most people get clean joints after practicing on 4–5 scrap pieces.
- PEX crimping: Easy. A crimp tool runs $40–$120, the rings are cheap, and a go/no-go gauge confirms every joint.
- SharkBite push-fit: Easiest. Code-legal in walls in most jurisdictions but verify locally. Slightly more expensive per fitting.
- Threaded (IPS): Easy mechanically but requires careful thread sealant application. Two wraps of PTFE tape plus a thin coat of pipe dope on the male threads.
Whatever method you choose, pressure-test the system at 100 psi for 15 minutes before closing the wall. If your municipal water is above 80 psi, install a pressure-reducing valve at the main — high static pressure shortens the life of every cartridge in the house and can contribute to corrosion that leads to rusty water out of the faucet down the line.
What’s the step-by-step process for roughing in a Moen Posi-Temp valve?
Once you’ve located studs, run the hot and cold supplies, and gathered tools, the actual install is about 90 minutes of work for a confident DIYer. Here’s the workflow we use on real jobsites:
- Build a 2×4 cross-brace between the studs at your chosen valve height (typically 76″–80″ for shower-only). Secure with 3″ deck screws.
- Mount the valve to the brace using the integral mounting tabs and #10 wood screws. The plaster guard should face you with its depth markings visible.
- Verify depth by holding a straightedge across the studs (representing the finished wall plane after drywall + tile) and measuring back to the plaster guard. Hit the 1-3/4″ to 2-3/4″ window — aim for the middle of the range, around 2-1/4″, to give yourself error margin.
- Make plumbing connections: hot to “H” port, cold to “C” port, vertical riser to shower outlet, and either drop pipe to tub outlet OR plug it with the brass plug.
- Open the integral stops if your valve has them (model 2520, etc.) before testing.
- Pressure-test at full system pressure with the cartridge installed, valve in the OFF position, for at least 15 minutes. Watch every joint with a flashlight.
- Install the plaster guard if you removed it during plumbing. The guard protects the cartridge from drywall dust, mortar, and dropped screwdrivers during the rest of the build.
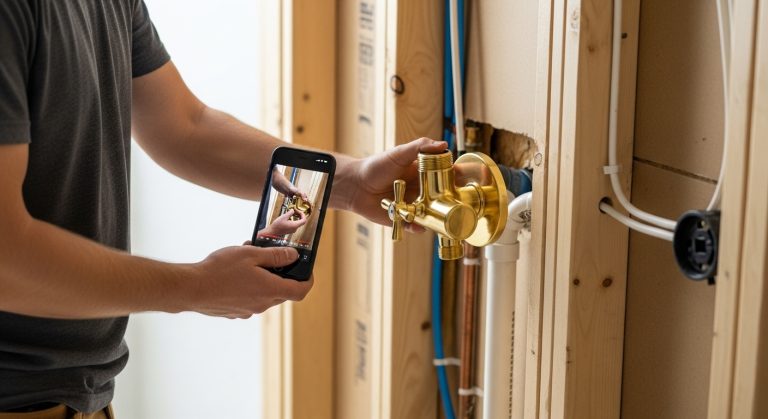
- Photograph the wall with measurements visible. You will be very glad you did six months from now when you forget exactly where the valve sits.
What are the most common mistakes during Moen shower valve rough in?
The short answer: wrong depth, wrong height, forgetting the tub-outlet plug, and skipping the pressure test. These four account for roughly 80% of post-install problems we see. Let’s break each down:
1. Valve set too deep. If the back of the plaster guard sits more than 2-3/4″ behind the finished wall, the trim stem won’t reach the cartridge and the handle won’t seat. The fix requires opening the wall again. Always dry-fit a tile sample on a scrap of drywall (or backer board) and use it as your reference for “finished wall.”
2. Valve set too shallow. If the guard is less than 1-3/4″ behind the finished wall, the trim plate won’t sit flush — you’ll have a gap and the escutcheon won’t seal against the tile. Water gets behind the trim and into the wall cavity. Use the plaster guard’s molded depth lines religiously.
3. Hot and cold reversed. The valve casting clearly marks H and C, but it’s surprisingly easy to swap them when you’re working upside-down behind framing. Posi-Temp valves include an internal balance spool that prevents scalding, but they do not work correctly with the supplies reversed — the handle will read “hot” when you turn it toward cold. Some Moen cartridges have a reversible installation orientation, but verify your specific model before assuming.
4. Forgetting to remove the tub outlet plug on a tub/shower install, or forgetting to install it on a shower-only install. Both are pressure-loss disasters.
5. Soldering with the cartridge installed. The 1222 and 1225 cartridges have rubber and plastic components that can warp under direct flame. Always remove the cartridge before sweating. The valve ships with the cartridge installed for shipping protection only.
How does the Moen Posi-Temp rough-in compare to Delta and Kohler?
If you’re choosing between brands or replacing a different brand’s valve, the rough-in details vary in small but important ways. Here’s a side-by-side look:
| Spec | Moen Posi-Temp | Delta MultiChoice | Kohler Rite-Temp |
|---|---|---|---|
| Depth range | 1-3/4″ – 2-3/4″ | 2-1/16″ – 3-7/16″ | 1-3/4″ – 2-3/4″ |
| Cartridge type | 1222 (Posi-Temp) | RP19804 (MultiChoice) | GP500520 (Rite-Temp) |
| Cartridge warranty | Lifetime | Lifetime | Lifetime |
| Pressure-balanced | Yes | Yes | Yes |
| Integral stops option | Yes (2520) | Yes (R10000-IP) | Yes (P8304) |
| Plaster guard guidance | Excellent — molded lines | Excellent — measuring tabs | Good |
The takeaway: Moen and Kohler share virtually identical rough-in geometry, while Delta’s MultiChoice sits slightly deeper. Trim is never cross-compatible — a Delta trim plate will not fit a Moen valve, period. Plan your finish and brand together before you frame the wall.
Do I need an access panel behind a Moen shower valve?
Code-wise, the answer is nuanced. Most jurisdictions require access to shower valves that have integral stops or unions, but allow concealed installation otherwise. Practically, an access panel — even a small magnetic one in an adjacent closet — saves you from cutting tile if a cartridge ever fails. We recommend one whenever the back of the shower wall faces a closet, hallway, or unfinished space. It costs almost nothing during construction and pays for itself the first time you need it.
If your Moen valve includes integral stops (the 2520 series), the stops let you isolate the valve without shutting off the whole house when you swap a cartridge. That’s a real convenience and worth the modest upcharge over the 2510. Integral stops are also a code requirement in some commercial settings — check with your local inspector for high-traffic installs like the ones discussed in our touchless faucet commercial guide, where downtime matters even more.
FAQ
What’s the difference between Moen 2510 and 2520?
The 2510 is the base Posi-Temp valve with no shutoffs; the 2520 has integral stops built into the casting so you can isolate the valve without killing house water. Same rough-in dimensions, same cartridge, same trim compatibility. The 2520 typically costs $15–$25 more and is worth it on any install you might service later.
Can I install a Moen shower valve with PEX directly?
Yes. Order the Moen Posi-Temp model with PEX crimp ports (model number ends in “-PEX”) and connect 1/2″ PEX-A or PEX-B directly with copper crimp rings or stainless cinch clamps. No transition fittings needed. This is the fastest and most leak-resistant method for DIYers.
How deep should the Moen shower valve sit behind the tile?
The back of the plaster guard must be 1-3/4″ to 2-3/4″ behind the finished tile face. Aim for roughly 2-1/4″ — the middle of the range — to give yourself wiggle room. The plaster guard has molded lines marking both extremes; verify before drywall goes up.
Do I need a cross-brace to mount the valve?
Yes. The valve must be rigidly secured so the handle can’t push it back into the wall. A 2×4 horizontal brace cut between the studs, screwed through both ends into the studs, is standard. The valve has integral mounting tabs that screw directly to this brace.
What height should I install my Moen shower valve at?
Standalone shower: 72″–80″ above the finished floor, with 76″–78″ being the sweet spot for mixed-height households. Tub/shower combo: 28″–32″ above the finished floor, typically 8″–12″ above the tub rim. The showerhead drop-ear sits at 80″–82″ AFF.
Can I use a Moen trim plate on a Delta or Kohler valve?
No. Trim is brand-specific. A Moen trim kit will not seal against a Delta or Kohler valve body, and vice versa. If you’re replacing trim only, you must use a kit designed for your existing valve. Mixed-brand “universal” trim plates are usually only universal across one manufacturer’s product line.
Is a pressure-balanced valve the same as anti-scald?
Functionally yes for most homes. Pressure-balanced valves like the Posi-Temp 1222 cartridge automatically adjust the hot/cold mix when a toilet flushes or another fixture is used, preventing dangerous temperature spikes. Thermostatic valves (Moen ExactTemp) go further by holding an exact set-point temperature, but cost considerably more. For residential use, pressure-balanced is the standard and meets ASSE 1016 anti-scald requirements.
Does Moen’s lifetime warranty cover the rough-in valve body too?
Yes. Moen’s residential limited lifetime warranty covers the valve body, finish (on trim), and cartridge against manufacturing defects for as long as the original consumer owns the home. You will need a receipt or model number when calling support. Cartridge replacements are typically shipped free of charge.
About the author
This guide was written by the Faucitta technical content team and reviewed by a licensed master plumber with 18 years of residential remodeling experience. We test every valve mentioned here on our in-house bench against ASSE 1016 pressure-balance standards and ASME A112.18.1 flow requirements before publishing dimensional guidance. Faucitta has shipped fixtures to over 200,000 North American homes since 2017 and backs every fixture we sell with a 5-year limited warranty on bodies and a lifetime warranty on cartridges, matching or exceeding industry norms. For finish care and pairing guidance after your install is complete, see our companion guides on oil-rubbed bronze faucet pairing and selecting fixtures that fit your wider bath design.