If you’ve been Googling how to change a faucet handle because yours is cracked, loose, wobbling, or you just want a new finish, good news: this is one of the easiest plumbing repairs there is. You’re not touching the water supply lines or the valve body — you’re only swapping the lever or knob you grab with your hand. As long as you buy a handle that matches your faucet’s brand and mount style, most people finish in under 20 minutes with a screwdriver and an Allen key.
Below I’ll walk you through exactly what to buy, the step-by-step removal, the two “gotcha” moments that trip people up (a hidden set screw and a stuck handle), and how to tell when a broken handle is actually pointing to a bigger problem inside the faucet.
What tools and parts do I need to change a faucet handle?
You need surprisingly little: a Phillips screwdriver, a set of hex/Allen keys, and the correct replacement handle for your specific faucet. That’s the whole list for a straightforward swap. Add a flat-head screwdriver, penetrating oil, and white vinegar only if the handle is stuck.
Here’s the honest truth most videos skip: the hard part isn’t the labor, it’s buying the right handle. Faucet handles are not universal. A Moen lever won’t fit a Delta stem, and a Delta handle won’t fit a Kohler cartridge. The handle attaches to a specific “broach” — the splined or D-shaped end of the stem or cartridge — and that pattern is brand-specific.
- Phillips screwdriver — for the set screw on many single-handle and widespread faucets.
- Hex / Allen key set — many modern single-lever handles use a tiny 7/64″ or 3/32″ hex set screw hidden under a cap.
- Flat-head screwdriver — to gently pry off the index/button cap without scratching it.
- Replacement handle — matched to your brand, model, and finish.
- Penetrating oil + white vinegar — only if there’s corrosion or mineral buildup locking the handle on.
- An old towel or rag — to plug the drain so you don’t lose the tiny set screw down it.
How do I find the exact replacement handle that fits my faucet?
Find your faucet’s brand and model number first, then order the matching handle kit from that brand — this is the single most important step, and it’s worth ten minutes of detective work. The brand name is usually stamped on the faucet base, under the spout, or on the underside of the handle you’re removing.
If you can’t find a model number, take three photos before you buy: the whole faucet, a close-up of the handle base, and — after removal — the exposed stem/cartridge broach. A hardware store plumbing associate or the brand’s online parts finder can match it. When the faucet is old or discontinued and no matching handle exists, you have two options: buy a “universal” lever handle kit with an adapter insert, or replace the entire faucet. If yours is an aging unit that fights you at every screw, our guide on removing a very old kitchen faucet when the nuts are rusted solid will save you a lot of grief.
How do you change a single-handle faucet handle step by step?
Turn off the water, pry off the cap, remove the hidden set screw, lift the handle straight up, then reverse the steps with the new handle. A single-lever kitchen or bathroom faucet is the most common type and the fastest to do. Here’s the full sequence:
- Shut off the water. Turn the two shutoff valves under the sink clockwise until they stop. You technically don’t need to for a handle swap, but if the handle slips and bumps the stem, water can shoot out — so do it. Then open the faucet to release pressure.
- Plug the drain. Push a rag into the drain opening. The set screw is tiny and loves to vanish.
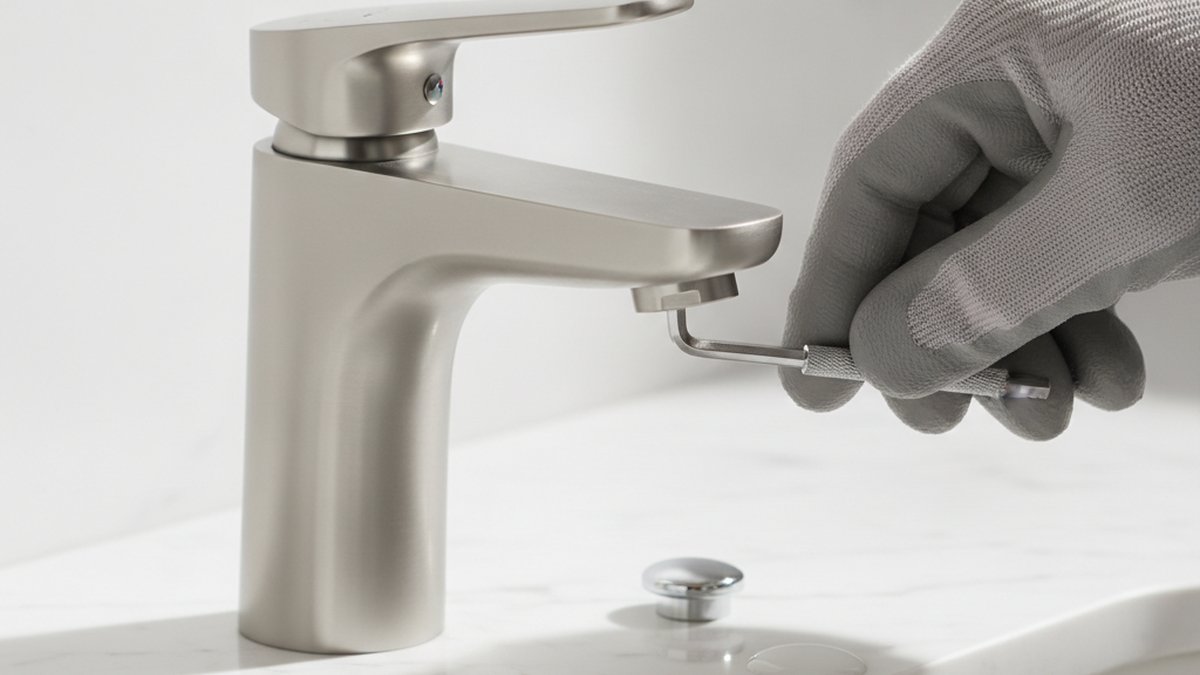
- Find and remove the cap. Most single levers have a small red/blue or brand-logo button on the top or front. Gently pry it off with a flat-head screwdriver to reveal the set screw underneath.
- Loosen the set screw. Use the correct hex key or Phillips driver. Turn it counterclockwise — you usually only need to loosen it, not fully remove it, so it stays captive in the handle.
- Pull the handle straight up. Lift it off the cartridge or stem in one straight motion. Don’t rock it side to side hard — you can damage the cartridge.
- Clean the exposed stem. Wipe off any grime or mineral scale so the new handle seats fully.
- Install the new handle. Slide it onto the broach, making sure it’s oriented so “off” points where it should. Tighten the set screw, snap the cap back on, and turn the water back on.
Test it: run hot and cold, and check that the handle stops firmly and doesn’t wobble. If it turns but no longer controls the water well, the issue is the cartridge, not the handle — more on that below.
How is changing a two-handle or widespread faucet handle different?
Two-handle faucets (separate hot and cold) work the same way, except the set screw is often hidden under a cap on the very top of each handle, and you’re doing the job twice. Everything else — cap off, screw out, handle up, new handle on — is identical.
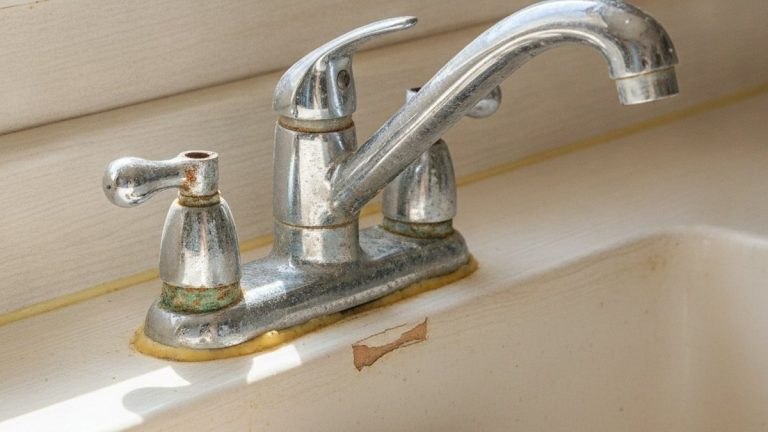
On many older two-handle bathroom and utility faucets, the handle sits on a broached stem held by a single brass screw straight down the center. Pop the index cap (the little H/C button) on top, remove that center screw, and the handle pulls up. If the handle is frozen from corrosion, that’s where a handle puller tool earns its keep — it grips the handle and jacks it off the stem without you cracking it.
Which faucet handle type do I have, and does it change the job?
The type mostly changes where the set screw hides and what tool you need — the core process is the same for all of them. Here’s a quick comparison so you can identify yours and grab the right tool before you start.
| Handle / Faucet Type | Where the set screw is | Tool needed | Difficulty |
|---|---|---|---|
| Single-lever (kitchen/bath) | Under a front or top button cap | Hex/Allen key (often 7/64″) | Easy — 10 min |
| Two-handle widespread | Under a top index (H/C) cap | Phillips or hex key | Easy — 15 min |
| Cross / lever on broached stem | Center screw under top cap | Phillips + handle puller if stuck | Moderate — 20 min |
| Roman tub / deck-mount handle | Under a decorative skirt or top cap | Hex key + long screwdriver | Moderate — 20–30 min |
| Shower/tub trim handle | Behind escutcheon or under cap | Hex key; sometimes cartridge puller | Moderate — 25 min |
If you’re dealing with a tub or Roman-style setup, the handle is only one piece of a larger trim assembly. Our explainer on the Roman tub valve and trim kit clears up which parts you can swap on their own and which are tied to the valve body behind the deck.
What do I do if the faucet handle is stuck and won’t come off?
If the handle won’t lift after the screw is out, it’s almost always corrosion or mineral scale gluing it to the stem — not a hidden second fastener. Stop yanking. Apply penetrating oil or wrap the base in a vinegar-soaked rag for 15–30 minutes to dissolve the deposits, then wiggle it gently upward.
Double-check first that you’ve actually removed every fastener. It’s easy to miss a second set screw or to leave the center screw partially threaded. Once you’re sure it’s free but stuck:
- Soak it. White vinegar breaks down the calcium/lime scale that’s welding the handle to the stem — this is the same hard-water buildup that ruins shower heads and cartridges over time.
- Use a handle puller. This inexpensive tool (about $10–15) grips the handle and pulls it straight off using screw pressure — far safer than prying, which cracks handles and bends stems.
- Rock gently, don’t force. Small side-to-side wiggles while pulling up beat one big violent tug.
- Add mild heat. A hairdryer on the metal base can expand it just enough to break the bond. Never use an open flame near plastic cartridges or finishes.
Hard water is the usual villain here. If your handles, aerators, and shower heads are constantly crusting up, it may be worth choosing fixtures built to resist it — see our roundup of the best bathroom faucet for hard water before your next replacement.
My handle is fine but the faucet still drips or is loose — is it really the handle?
Often, no. A dripping faucet or a handle that spins loosely usually means a worn cartridge, stem, or O-ring inside — replacing just the handle won’t fix that. The handle is just the lever; the actual water control lives in the cartridge or stem below it.
Use this quick test. After you remove the handle, look at the part underneath:
- The handle itself is cracked, corroded, or the wrong finish → a handle swap is all you need.
- The faucet drips even when fully off, or gets stiff/loose to turn → the cartridge or stem is worn and should be replaced too.
- The handle wobbles because the broach is stripped → the cartridge/stem is chewed up; replace it, then fit the new handle.
If your tap keeps dripping, the real repair is usually a stem or cartridge, and it’s not much harder than the handle itself — walk through our guide on replacing a faucet stem when your tap keeps dripping. And if you’ve got a pull-down kitchen faucet where the sprayer is the actual problem, you may only need a pull-down sprayer head replacement rather than any handle work at all.
How much does it cost to change a faucet handle yourself?
A DIY faucet handle swap costs roughly $8–$40 for the replacement handle, versus $75–$150 if you hire a plumber for the same 15-minute job. Universal lever kits run cheaper; genuine brand-matched handles in premium finishes (matte black, brushed gold) cost more but fit perfectly and match the rest of your fixture.
Because the part is cheap and the labor is easy, this is one of the highest-value DIY repairs in a bathroom or kitchen. The only way to overspend is to buy the wrong handle twice — so confirm the brand and broach before you order. If you end up deciding the whole faucet is tired and dated, it’s often smarter to upgrade the fixture entirely; our guide to the best bath faucet brand for 2026 can point you toward units with easy-to-source replacement handles down the road.
FAQ
Can I change a faucet handle without turning off the water?
You can, because you’re not opening the water supply — but you shouldn’t. If the handle slips off and nudges the cartridge while pressure is live, water can spray out. Turning the shutoff valves under the sink takes 20 seconds and removes all risk, so do it every time.
Are faucet handles universal or interchangeable between brands?
No. Faucet handles attach to a brand-specific stem or cartridge broach, so a Moen handle won’t fit a Delta or Kohler faucet. You must match the handle to your faucet’s brand and model, or buy a universal kit that includes adapter inserts for common broach patterns.
Why does my faucet handle keep coming loose after I tighten it?
A handle that won’t stay tight usually has a stripped set screw, a stripped broach on the cartridge, or a missing/worn adapter. Try a fresh set screw first. If the splines on the cartridge stem are rounded off, the cartridge itself needs replacing — a new handle alone won’t grip a worn stem.
How do I remove the little cap on top of the faucet handle?
Gently pry the button or index cap off with a small flat-head screwdriver, working the edge up a little at a time to avoid scratching the finish. On some models the cap unscrews instead of prying — twist counterclockwise first, and if it resists, then pry. Underneath you’ll find the set screw.
What size Allen wrench do I need for a faucet handle set screw?
Most single-lever faucet handle set screws take a 7/64″ or 3/32″ hex key, though sizes vary by brand. The easiest move is to buy a small SAE/metric hex key set for a few dollars and test until one seats snugly — never force a slightly-too-small key, as it will round out the screw.
Should I replace the cartridge at the same time as the handle?
Only if the faucet drips, feels stiff, or the handle wobbles from a stripped stem. If the faucet works perfectly and you’re just swapping a cracked or dated handle, leave the cartridge alone. Since you’ve already removed the handle, though, it’s a convenient moment to inspect the cartridge for wear.
Author note: This guide was written by the faucitta fixtures team, drawing on hands-on installation and repair of single-lever, widespread, and Roman tub faucets across major brands (Moen, Delta, Kohler, and more). We’ve swapped hundreds of handles and know exactly where each brand hides its set screw.
About faucitta: faucitta (faucitta.net) specializes in faucets and bathroom fixtures — kitchen faucets, shower heads, tub fillers, and replacement parts. Our repair guides are tested against real fixtures and reviewed for accuracy. When choosing replacement handles and cartridges, we recommend parts that meet ASME A112.18.1 / NSF 61 plumbing standards and confirming your faucet’s warranty terms first — many major brands offer limited lifetime warranties that cover free replacement handles and cartridges, so you may be able to get the exact part shipped to you at no cost.