A bathtub faucet handle replacement is one of the few bathroom fixture repairs almost anyone can do with a screwdriver, an Allen key, and fifteen dollars in parts. If your handle is cracked, spinning loosely, leaking at the base, or you just hate the dated chrome lever, you usually do not need to open the wall, replace the valve, or pay a plumber $150 for a house call. You need the right handle and ten minutes of patience. This guide walks through exactly how to do it, how to identify the part you need, and when the loose handle is actually a sign of a bigger problem hiding behind the tile.
At faucitta, we spend our days sourcing and pressure-testing tub and shower trim, so below is the same advice we’d give a friend standing in the bathroom with a screwdriver — no upsell, no padding.
Can you just replace the handle, or do you need the whole faucet?
In most cases you can replace just the handle. The handle is a separate trim piece that slides onto the valve stem sticking out of the wall. As long as the valve behind the wall still works — water turns on, off, and temperature adjusts — you only swap the handle and maybe the escutcheon (the round wall plate). You only need a full valve replacement if water won’t shut off, the stem itself is stripped or broken, or you’re changing faucet brands entirely.
Here’s the quick test. Turn the water on and off with the old handle. If it controls flow and temperature normally and the only issue is a cracked, loose, or ugly handle, it’s a pure handle job. If the handle spins endlessly without engaging, or water keeps dripping no matter how hard you crank it, the problem is deeper — usually a worn cartridge or stem, which is a different repair. We cover that scenario in our guide on replacing a faucet stem when your tap keeps dripping.
How do you remove an old bathtub faucet handle that won’t budge?
Shut off the water, find and remove the hidden set screw under the decorative cap, then wiggle the handle straight off the stem — and if it’s stuck, use a handle puller rather than prying. Corrosion and mineral buildup are what glue old handles in place, so the fix is penetrating the buildup, not brute force that can crack the valve.
Step by step:
- Turn off the water. Use the bathroom shutoff if you have one, otherwise the main house valve. Open the tub spout to drain pressure and confirm it’s off.
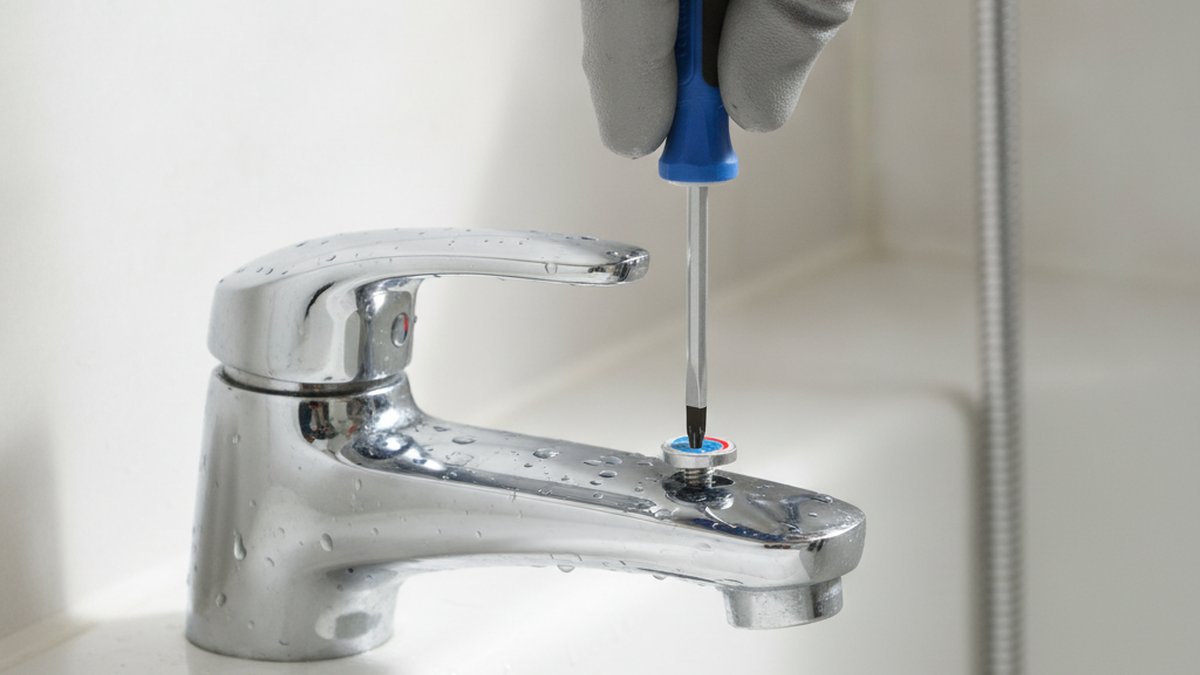
- Find the screw. On single-lever handles it hides under a snap-on index cap (the red/blue button or brand logo) — pop it off with a fingernail or small flat screwdriver. On two-handle faucets the screw may be under a cap on top of each handle.
- Back out the set screw. Most are Phillips or a hex/Allen screw. Keep it — you may need the exact size again.
- Pull the handle straight off. Wiggle gently side to side while pulling outward. Do not yank at an angle.
- Stuck handle? Spray white vinegar or penetrating oil around the stem, wait 15 minutes, then use an inexpensive handle puller (about $12–20) that grips the handle and pushes against the stem. This is far safer than prying with a screwdriver, which chips tile and bends stems.
If you’ve never taken a faucet handle off before, the mechanics are identical across tubs and sinks; our walkthrough on how to change a faucet handle yourself shows the same steps with more photos.
How do I know which replacement handle actually fits my valve?
The handle must match your valve brand and its stem “broach” — the pattern of splines on the stem the handle slides onto. A handle that looks identical can still refuse to tighten if the spline count is wrong, so identification matters more than looks or finish.
There are three ways to get the right part:
- Identify the brand. Look for a name stamped on the trim, escutcheon, or handle — Delta, Moen, Kohler, Pfister, or an import brand. Brand + a photo usually narrows it fast.
- Count the splines. Pull the handle and count the grooves on the stem (common broaches are 16-point, 20-point, “D” shaped, or broached for a specific cartridge). Universal and multi-fit handle kits list the broaches they cover.
- Measure and photograph. Snap a clear photo of the exposed stem and measure its diameter. A hardware counter or our support team can match it from that.
If the stem itself looks chewed up or rounded, the handle won’t grip no matter what you buy — that’s a stem or cartridge issue, not a handle issue. Also check the little cap that covers the handle hub; a missing or wrong one causes wobble and water intrusion, and we explain sizing in our piece on what a bathtub faucet cap is and which one you need.
Single-handle vs. two-handle vs. three-handle tubs — does it change the job?
The removal steps are the same, but the part count and cost differ. A single-lever tub has one handle to buy. A two-handle setup has separate hot and cold handles (buy them as a matching pair). A three-handle system adds a center diverter handle. Always replace matching handles together so the finish and feel are consistent.
What does a bathtub faucet handle replacement cost in 2026?
Expect $8–$45 for a handle if you do it yourself, or $120–$250 if a plumber does it — most of which is labor for a 20-minute job. That cost gap is exactly why this is a worthwhile DIY.
| Option | Typical Cost | Time | Best For |
|---|---|---|---|
| Brand-specific OEM handle | $18–$45 | 20–30 min | Exact match, warranty-backed valves |
| Universal / multi-fit handle kit | $8–$20 | 25–40 min | Unknown or discontinued brands |
| Full trim kit (handle + escutcheon + spout) | $45–$120 | 45–60 min | Updating the whole look |
| Plumber labor (handle only) | $120–$250 | Scheduled visit | Seized parts, no tools, rental units |
A universal kit is tempting because it’s cheap, but a true OEM handle from your valve’s maker seats more precisely and keeps the factory warranty intact. If you’re refreshing the whole shower/tub look anyway, a coordinated trim kit costs less than buying pieces separately — similar logic to picking a full Roman tub valve and trim kit when you want everything to match.
Why is my bathtub faucet handle loose or leaking even after I tightened it?
A handle that stays loose or drips after tightening usually means worn stem splines, a missing adapter/sleeve, or a failing cartridge behind the handle — not a handle you simply didn’t crank hard enough. Over-tightening a set screw onto a rounded stem just strips it further.
Run through these causes in order:
- Stripped stem splines: if the grooves on the stem are rounded, the handle can’t lock. You’ll need a stem/cartridge replacement or a broach adapter sleeve.
- Wrong broach adapter: some universal handles include plastic adapters; the wrong one leaves play. Swap to the correct adapter.
- Leak at the base of the handle: this is water coming past the valve’s O-rings or cartridge, not the handle itself. The handle is just where you notice it.
- Escutcheon not sealed: a loose wall plate lets water run behind the tile. Re-bed it with fresh silicone.
If water is actively getting behind the wall, don’t ignore it — that’s how you end up with rot and mold. For a deeper fix that goes past the trim and into the rough plumbing, see our step-by-step on how to replace bathtub faucet plumbing without flooding the bathroom.
What tools and finishes should you have ready before you start?
You need a screwdriver set, an Allen/hex key set, white vinegar or penetrating oil, plumber’s silicone, and optionally a handle puller — and you should match your new handle’s finish to the rest of the room. Having everything staged means you finish in one sitting instead of a hardware store round-trip with the water off.
Finish matters more than people expect, because the handle sits right at eye level in the tub. Here’s how the common options hold up:
| Finish | Look | Durability / Upkeep |
|---|---|---|
| Polished Chrome | Bright, classic | Very durable; shows water spots |
| Brushed Nickel | Warm, satin gray | Hides spots and fingerprints well |
| Matte Black | Modern, bold | Durable; shows hard-water film in tough water |
| Oil-Rubbed Bronze | Traditional, dark | Living finish; patina changes over time |
If you’re leaning modern, brushed nickel is the most forgiving everyday choice — we break down why in our guide to a brushed nickel faucet for a modern bathroom. Whatever you pick, keep the tub handle, spout, and any shower trim in the same finish family so the bathroom reads intentional.
Do you need to replace the escutcheon and spout too?
Not required, but recommended if they’re pitted, mismatched, or you’re changing finish. A shiny new matte-black handle next to a corroded chrome wall plate looks worse than leaving it alone. If the old escutcheon is fine and the finish matches, reuse it and just re-seal the edge with silicone.
When should you stop and call a professional instead?
Call a plumber if the water won’t fully shut off, the valve body is cracked, the stem snapped off inside the wall, or you see active leaking behind the tile. Those are the situations where a cheap handle swap turns into water damage, and a pro is genuinely cheaper than repairing a rotted wall.
Everything short of that — loose handles, cracked levers, dated finishes, stiff-but-working handles — is squarely in DIY territory. The job rewards patience: go slow on stuck parts, identify the broach correctly, and don’t force a set screw onto a damaged stem.
FAQ
Are bathtub faucet handles universal?
No, not truly universal. “Universal” handle kits cover several common stem broaches with included adapters, but they won’t fit every valve. For a guaranteed fit, match the handle to your valve brand or count the splines on your stem before buying.
Do I have to turn off the water to replace just the handle?
Yes. Even though the valve stays closed during the swap, you should shut off the supply so a bump or accidental turn doesn’t send water spraying while the handle is off. Use the bathroom shutoff if present, otherwise the main.
My set screw is stripped — how do I get the handle off?
Try a screw-extractor bit or a rubber band pressed into the screw head to give the driver grip. If that fails, a handle puller can sometimes pull the handle off around a seized screw. Replace the stripped set screw with a new one of the same thread when you reassemble.
Can a loose tub handle cause a leak?
The loose handle itself rarely causes the leak — it’s usually a sign the valve’s cartridge or O-rings are worn, which shows up as dripping or water at the handle base. Replacing the handle won’t stop that; you’ll need to service the cartridge or stem.
How long does a bathtub faucet handle replacement take?
About 20–40 minutes for a straightforward swap. Budget extra time if the old handle is corroded onto the stem, since you’ll want to let penetrating oil or vinegar work before pulling it. A full trim kit with escutcheon and spout runs closer to an hour.
What’s the difference between a handle, a trim kit, and a valve?
The valve is the water-control mechanism inside the wall. The trim is everything visible — handle, escutcheon, spout. A trim kit bundles those visible pieces. A handle replacement is the smallest, cheapest part of that chain, and the most common DIY fix.
Author note: This guide was written by the faucitta fixtures team, who source, install, and bench-test tub and shower trim year-round. faucitta is a dedicated faucet and bathroom-fixtures specialist (faucitta.net), and every handle and trim kit we carry is checked against standard valve broaches and backed by a manufacturer warranty — we recommend keeping your purchase receipt and warranty card, since OEM handles typically carry limited lifetime finish and function coverage when installed correctly.